Procreate propose a lot of settings to create amazing brushes from scratch, but it's a lot of experimentation before arrive to a good result.
Especially when you try to create specific effects close to real media.
Wet brushes are in this category...
This article propose you a way to make really wet watercolor brush from scratch.
In the next video we use a watercolor paper background for more realistic effect.
For this example we will create a combined brush, it's a brush composed by 2 brushes...
It's more complex, but to arrive to the expected result, it's necessary.
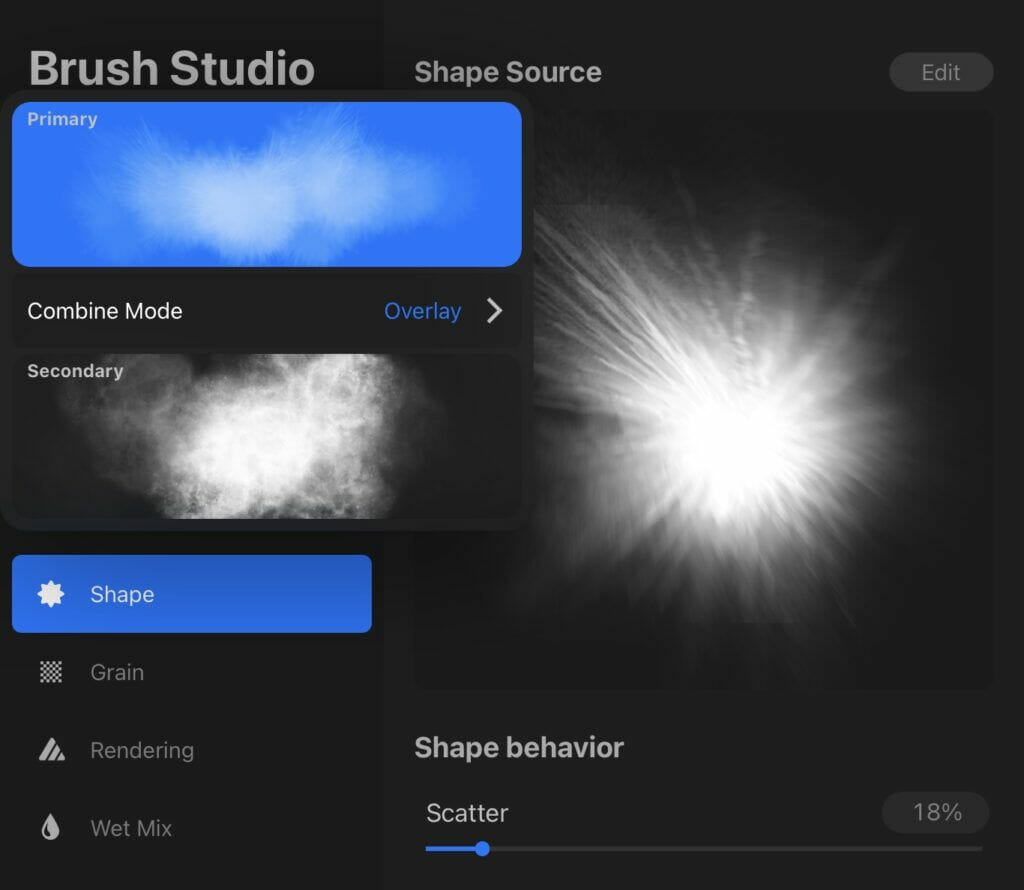
In Brush Combine Mode, as you can see in the next screenshot at the Up Left corner, under Brush Studio, you can see 2 brushes.
First we will create the main brush, and at the end of the article, i will come back to this page to explain the combination and how the combination of the 2 brushes create a final effect.
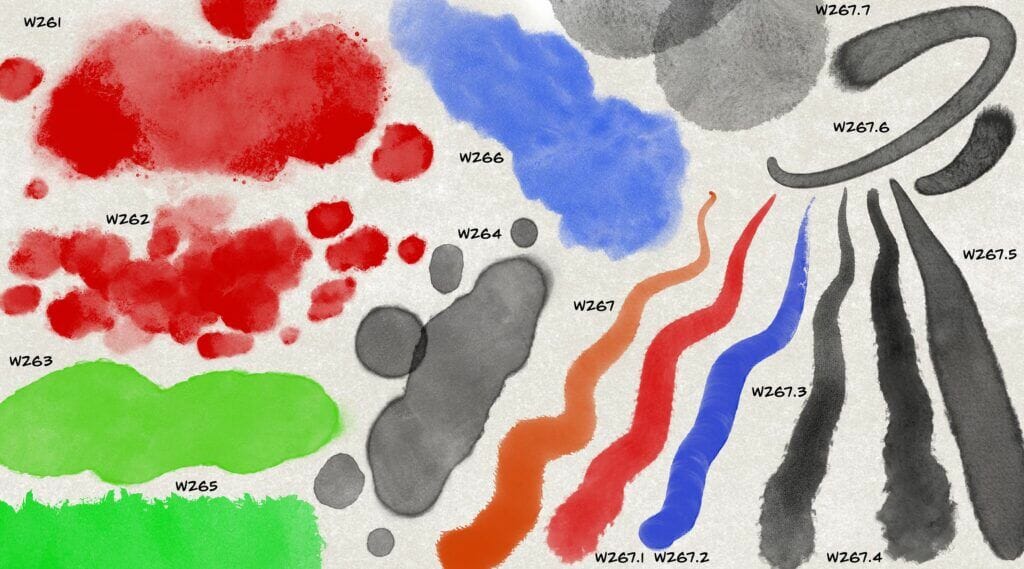
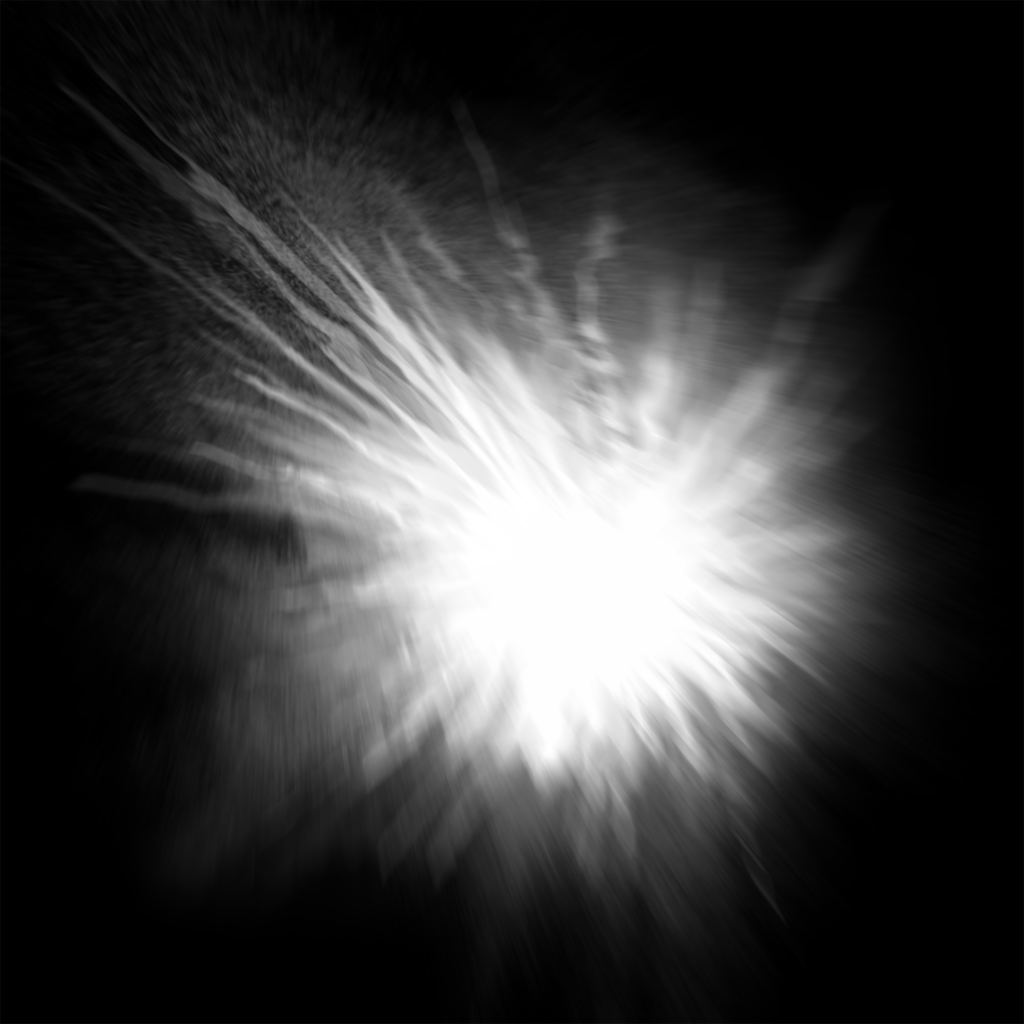
The first operation will be to create a main shape for the brush.
For this in Procreate, open a square canvas with a black background.
Because this form will be the main shape, try to create something a bit hairy, close to an old real brush.
Experiment...
It's not bad, but a bit hard, i will try to transform and blur it...
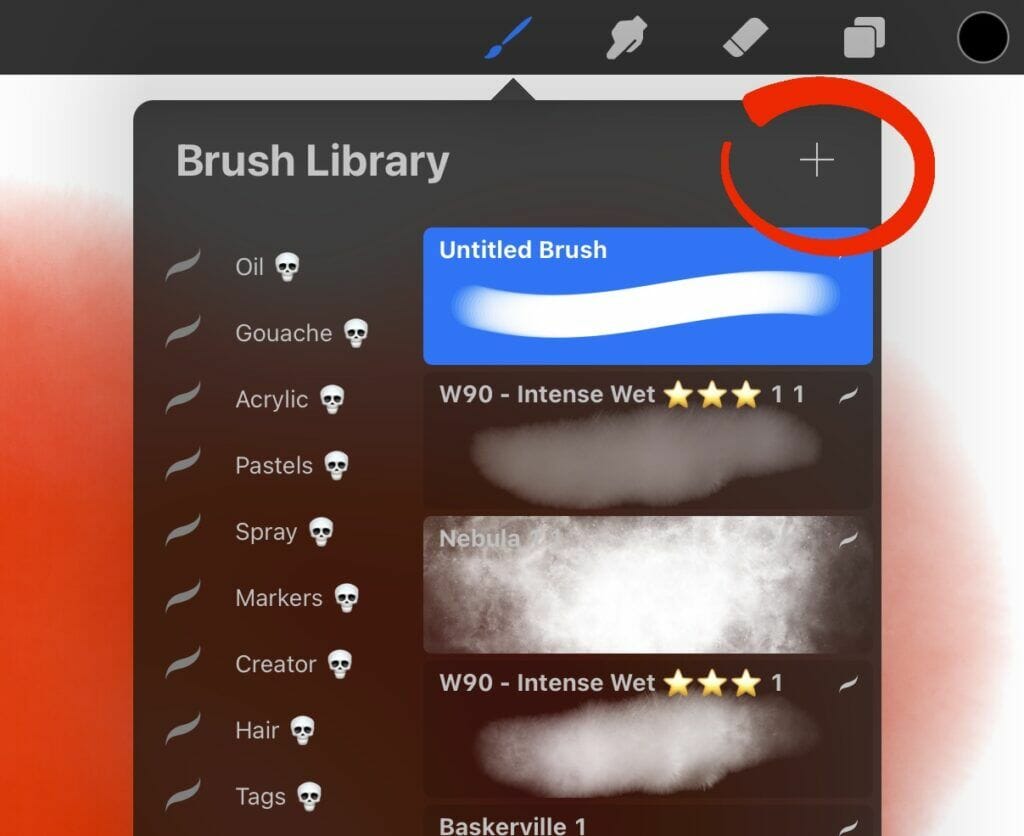
At the top right corner of the brush library, click + to create new brush
You arrive to the basic Procreate brush.
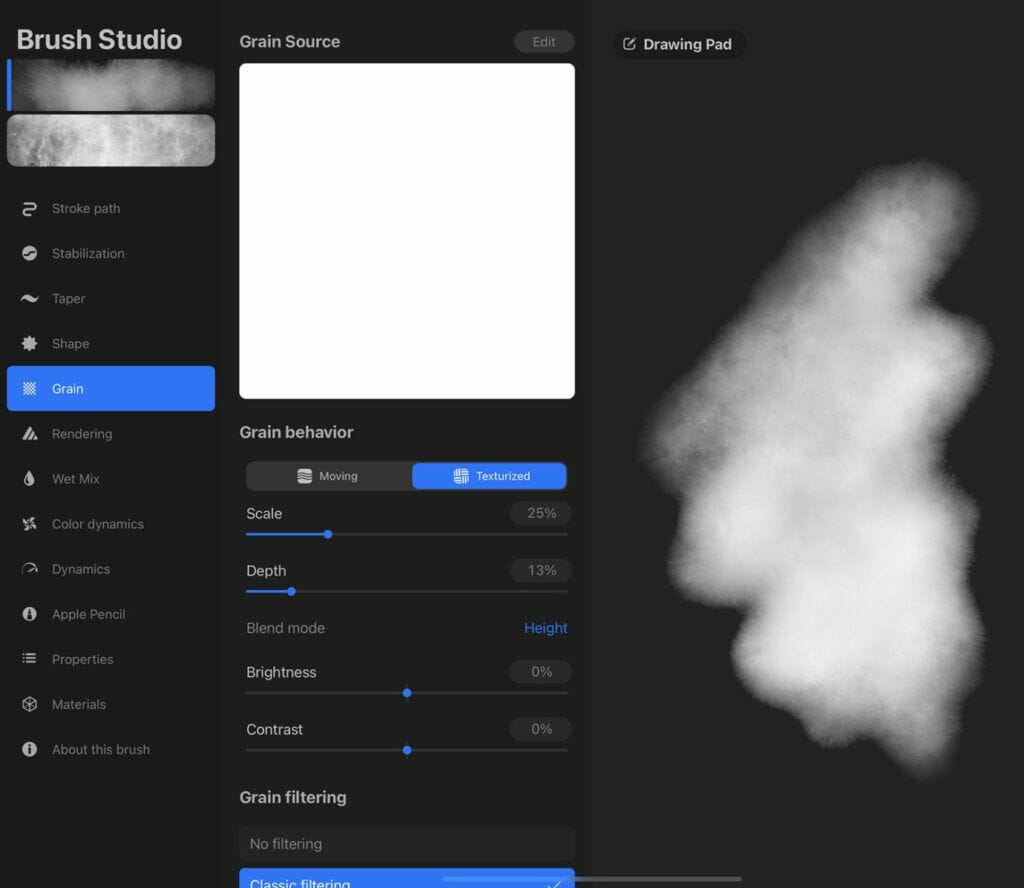
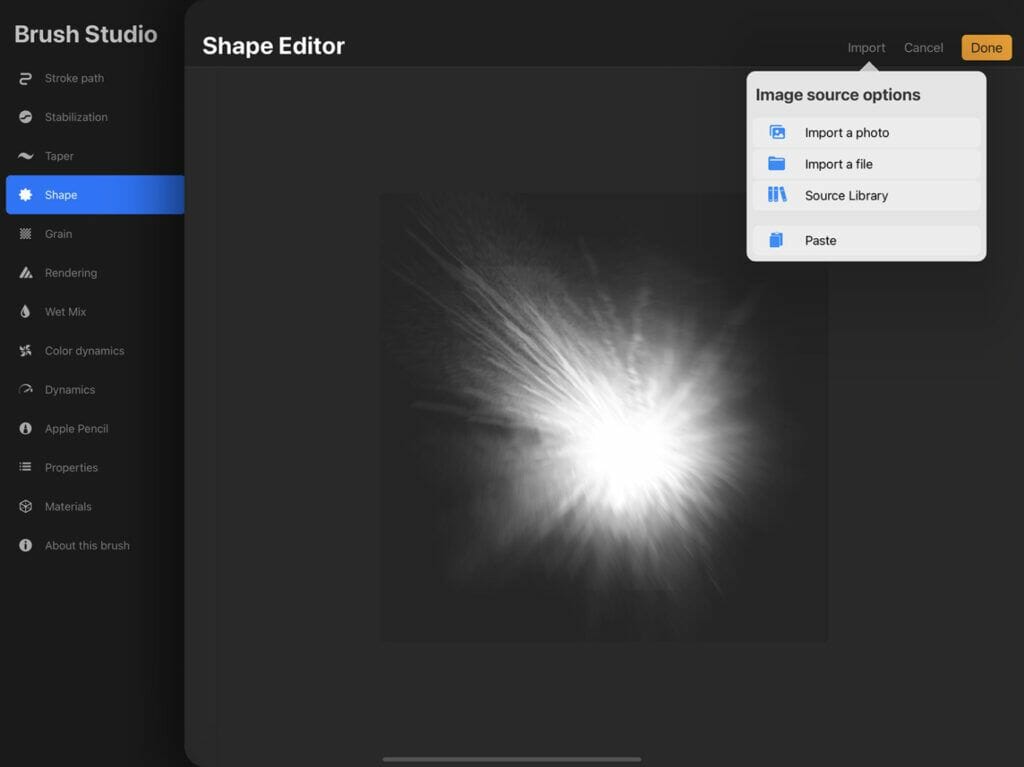
To import the shape you previously created, go to the shape section of the brush settings.
Click "edit"
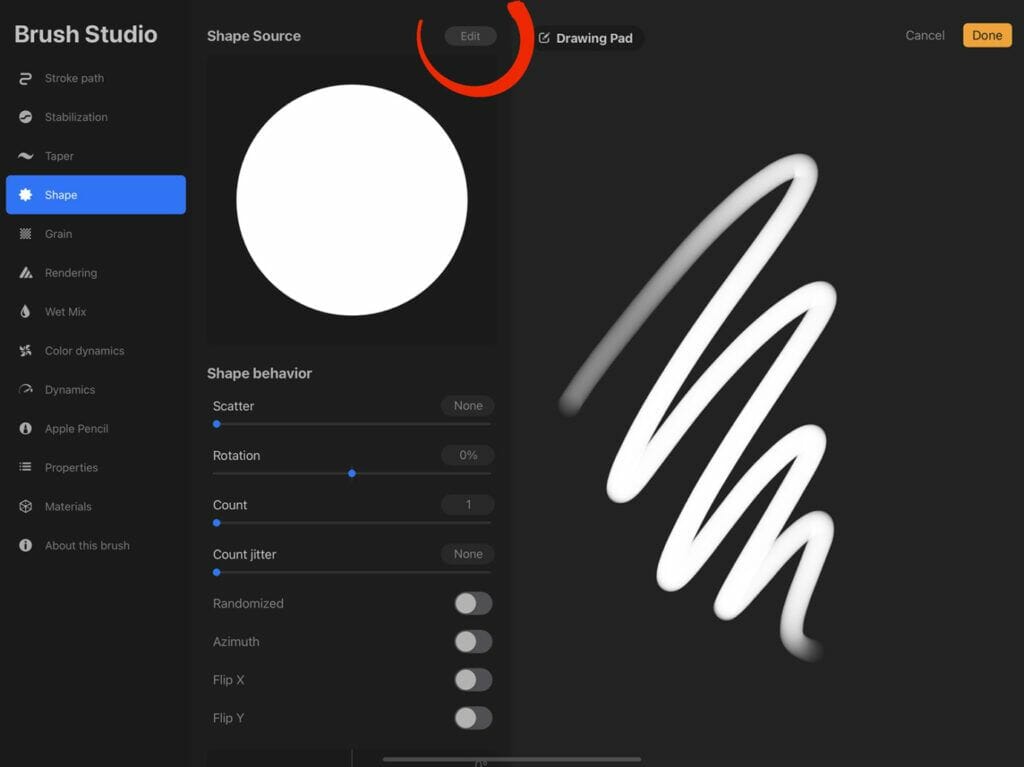
Import your shape saved in your photo library or just paste it if you previously copy it from Procreate.
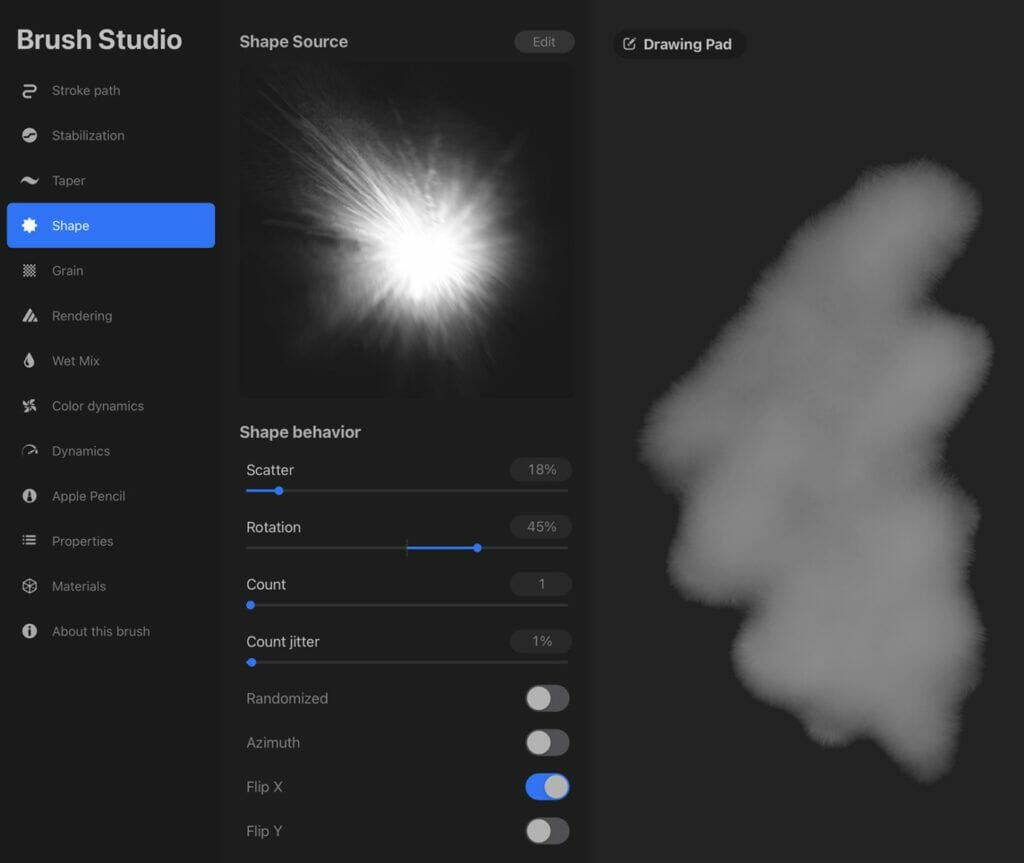
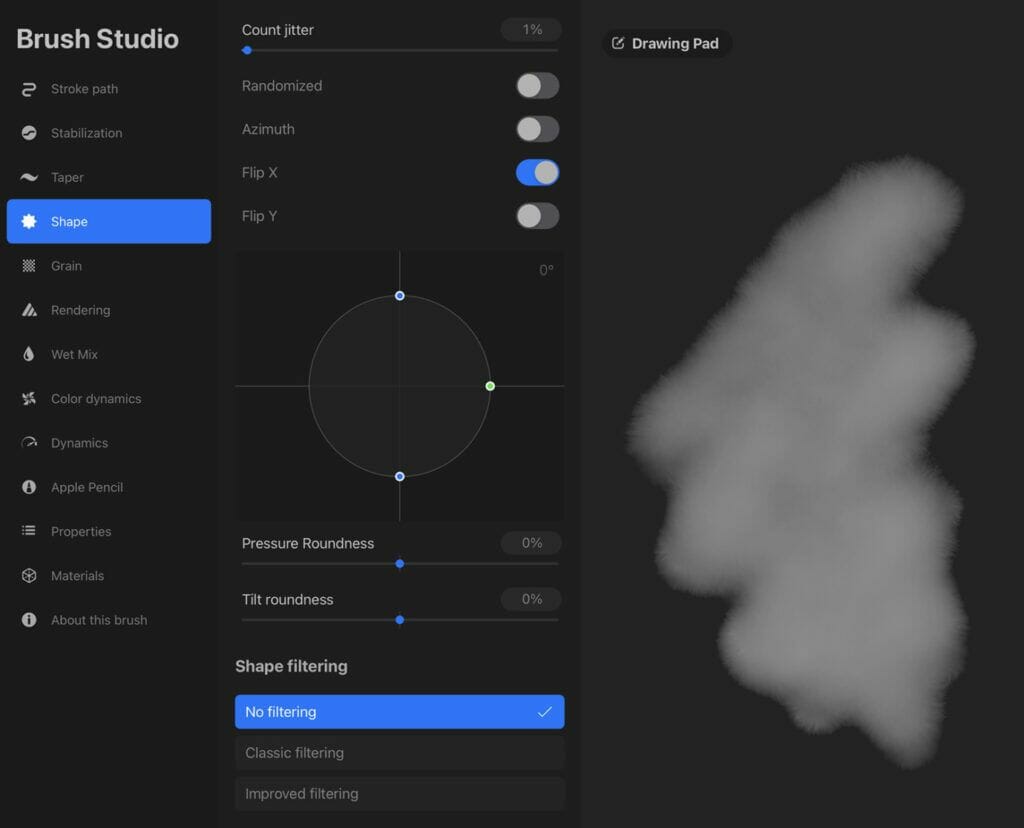
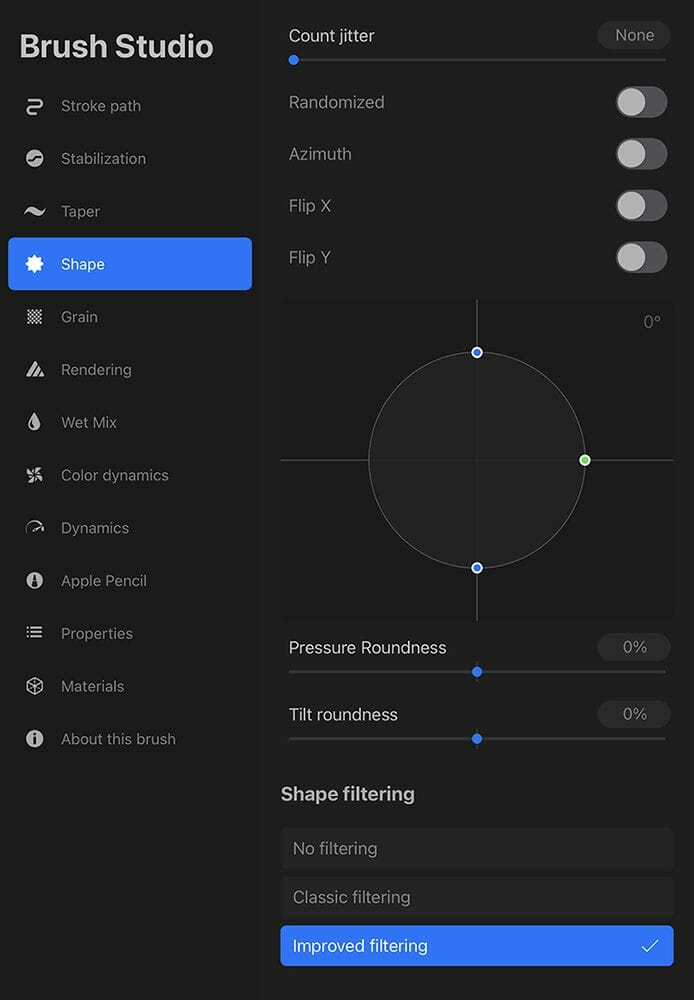
Adjust Shape settings...
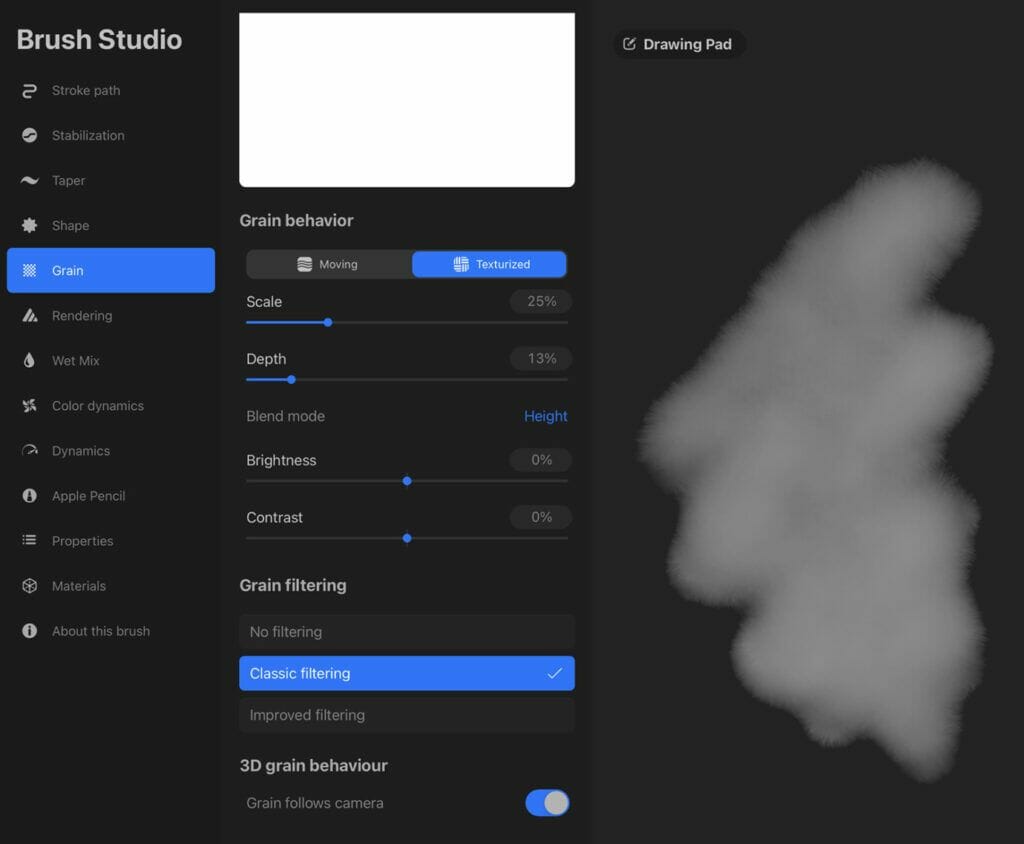
The Grain is the texture you will grab with the shape...Here we keep it flat white as default, and adjust the settings.
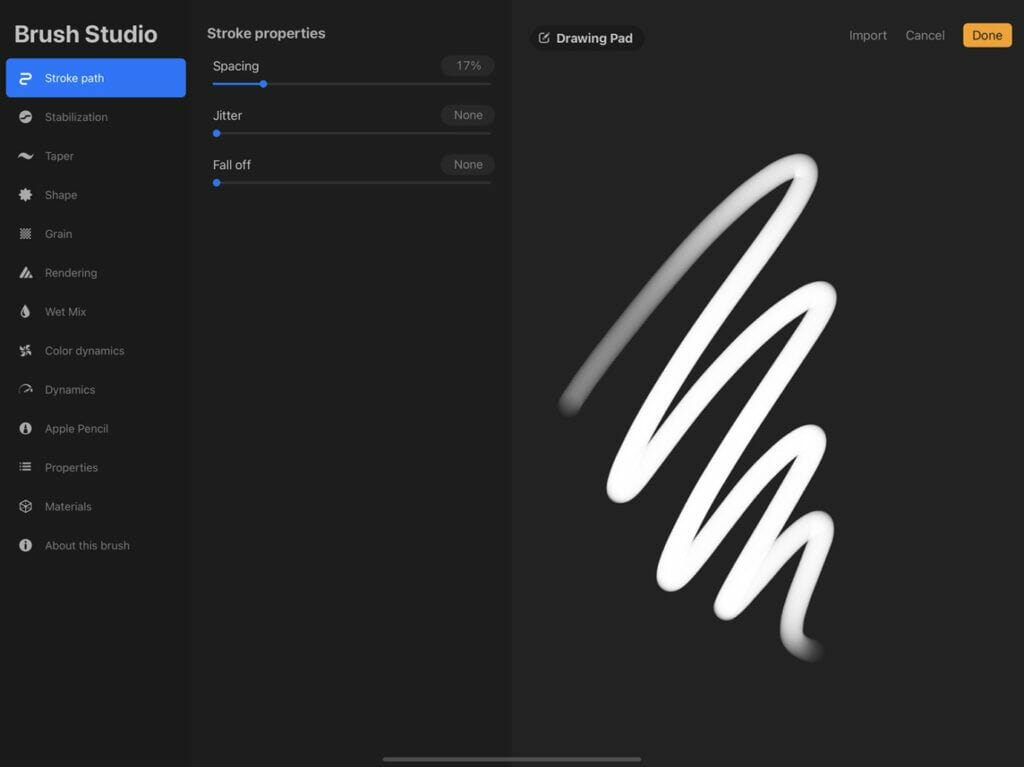
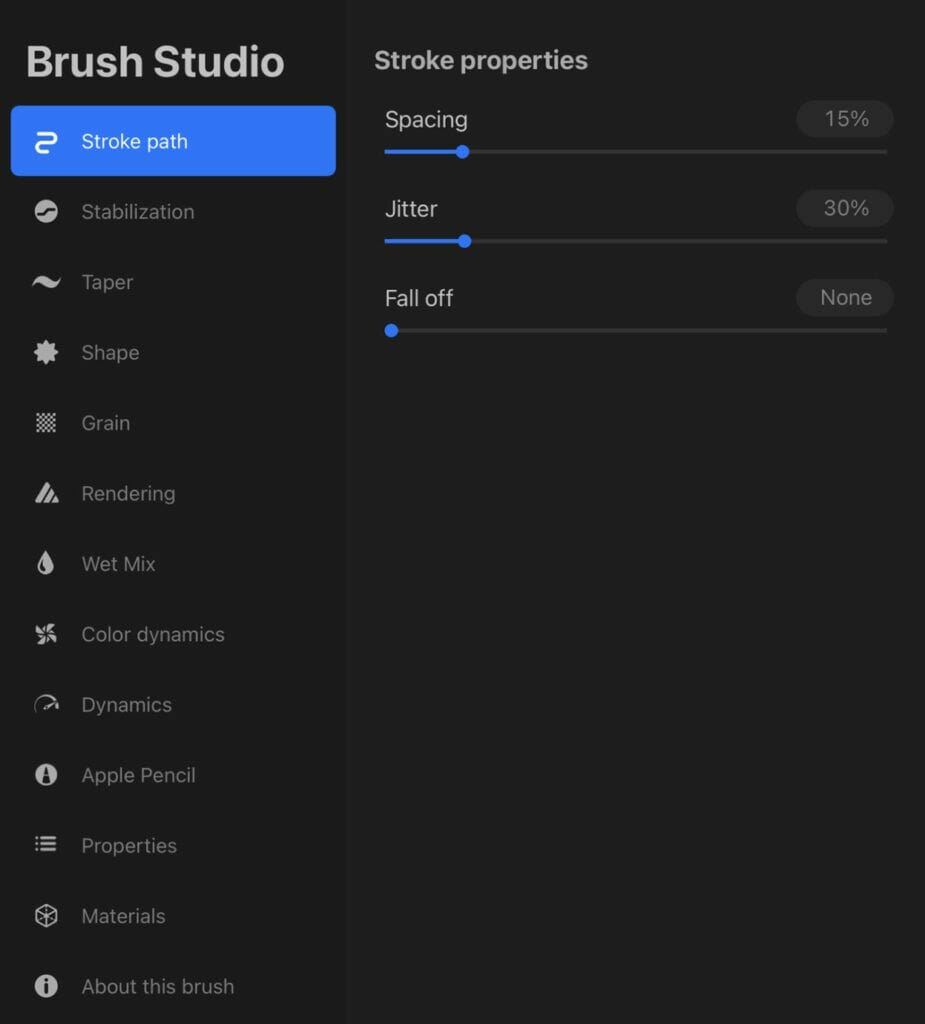
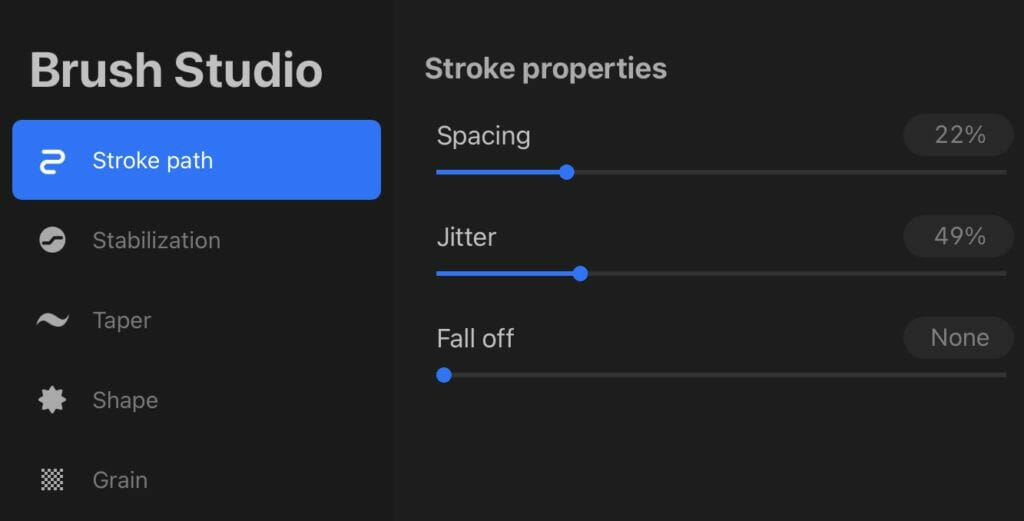
Stroke Path
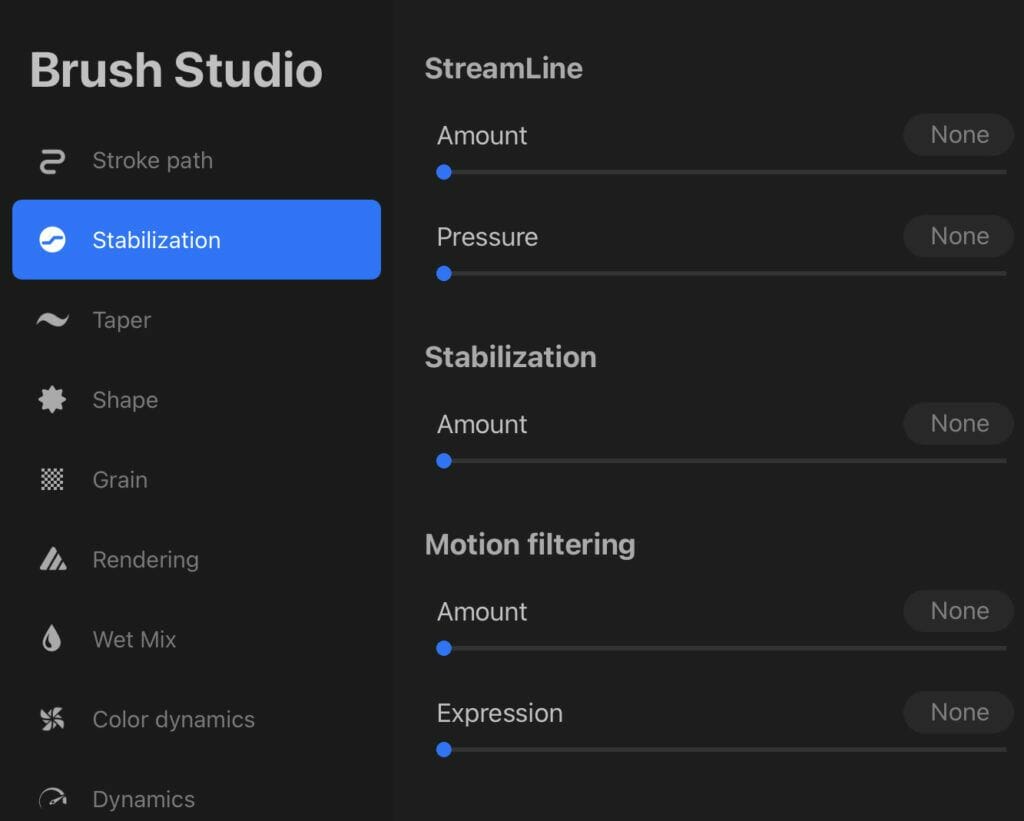
Stabilization
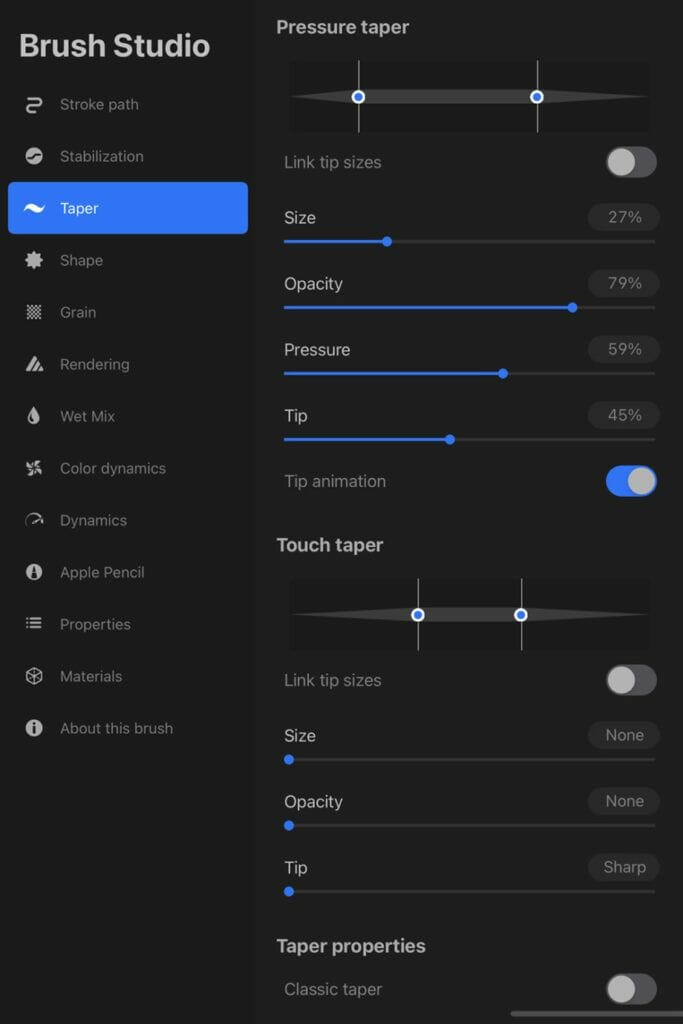
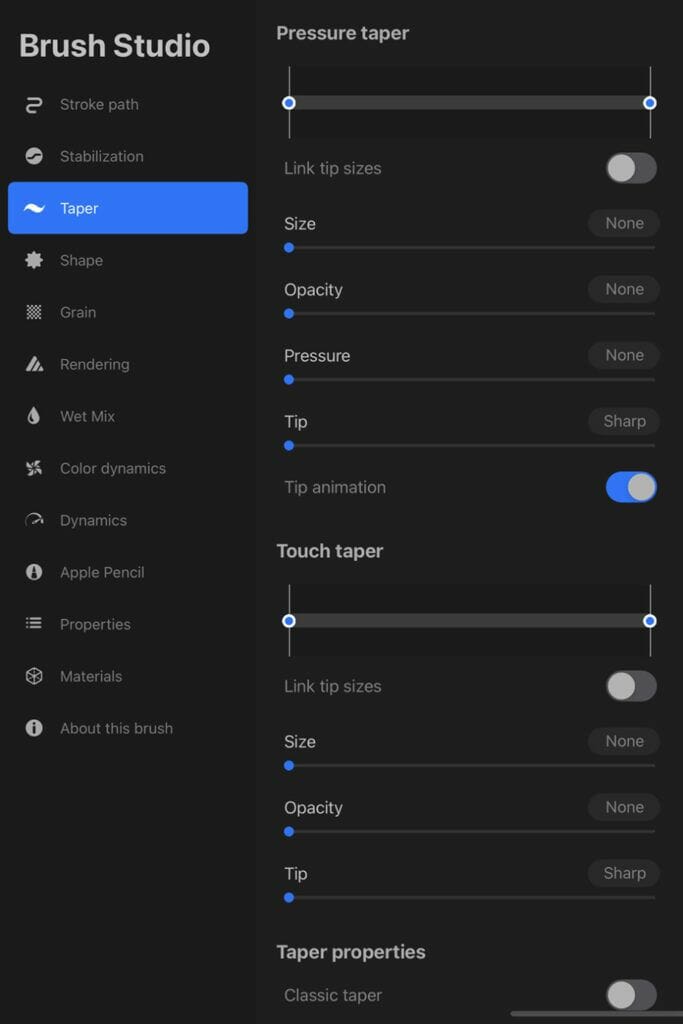
Taper
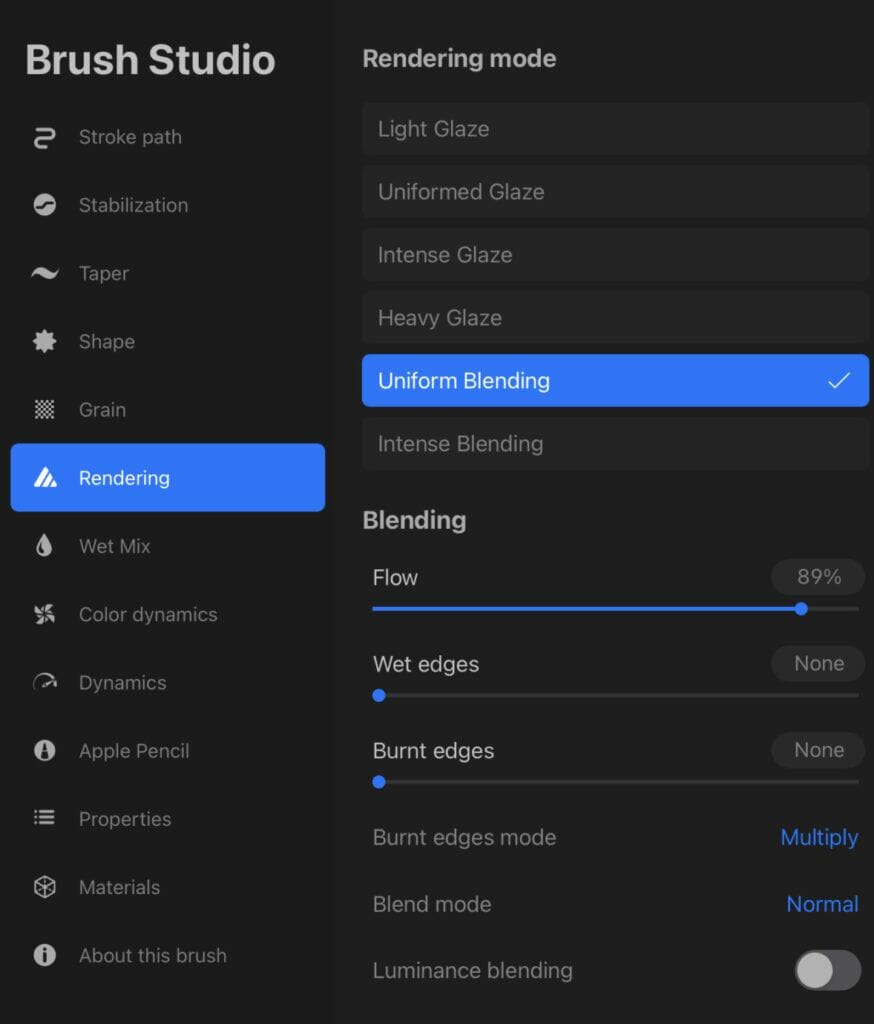
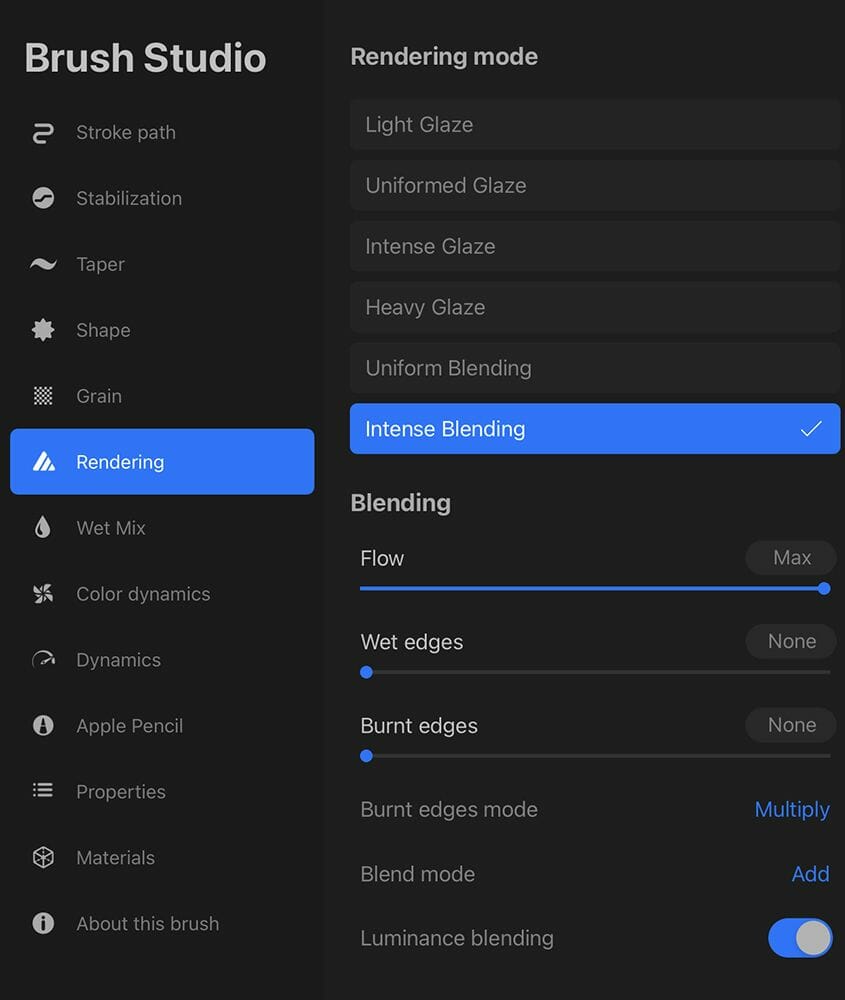
Rendering
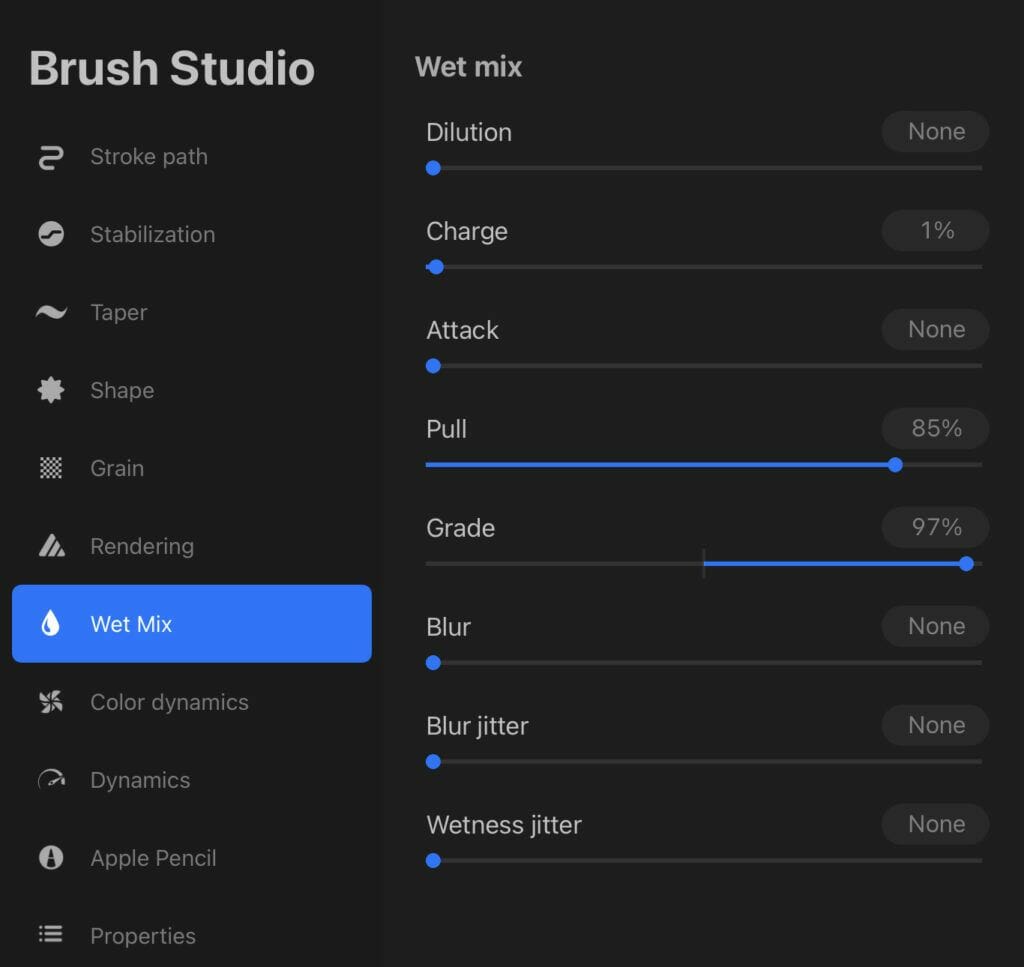
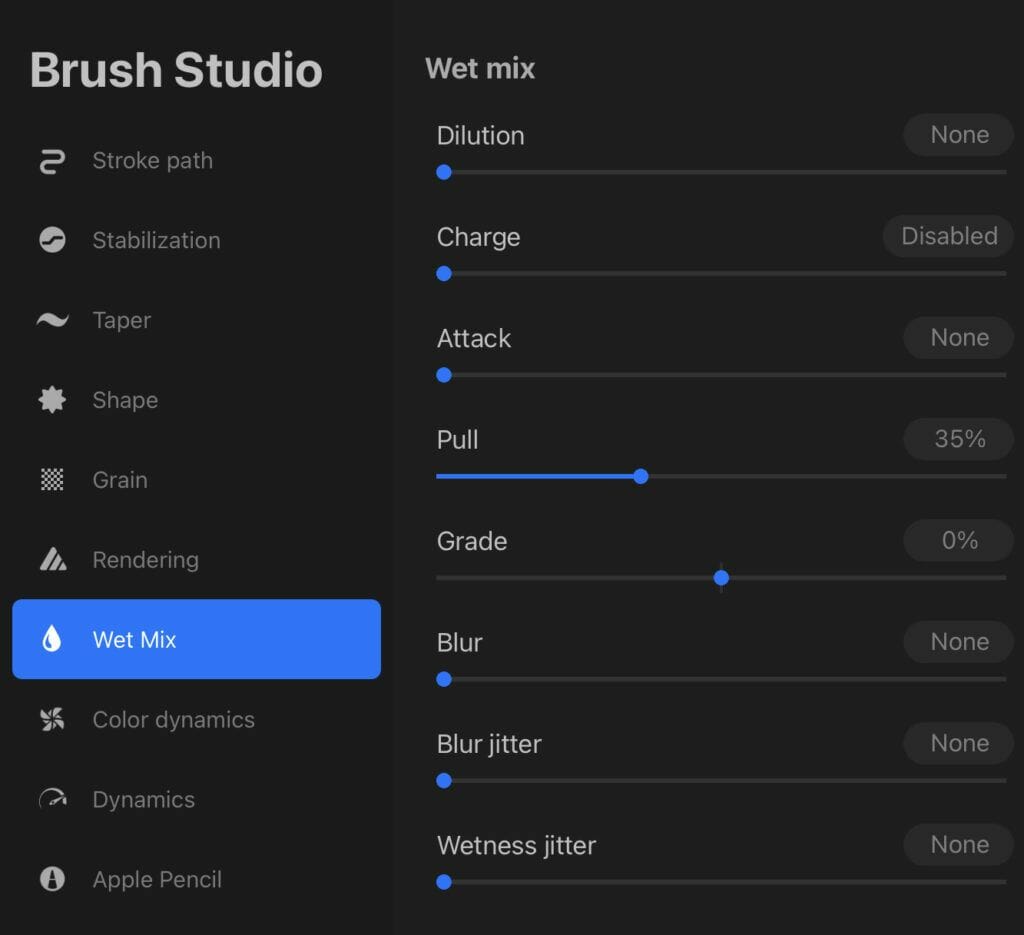
Wet Mix
Let's the "Color dynamics" and "Dynamics' as default.
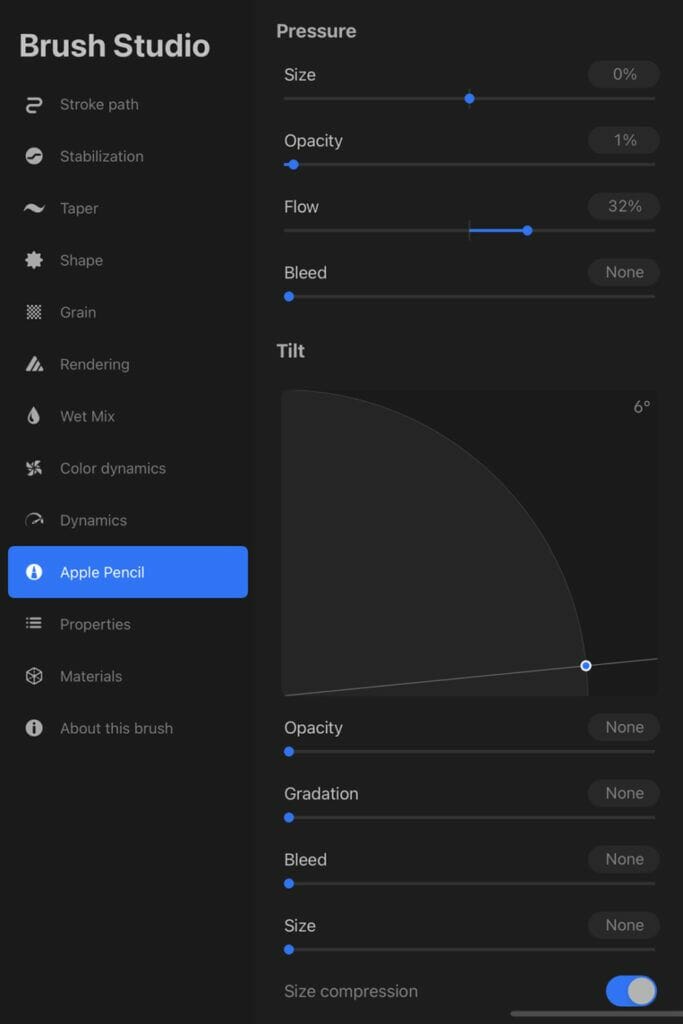
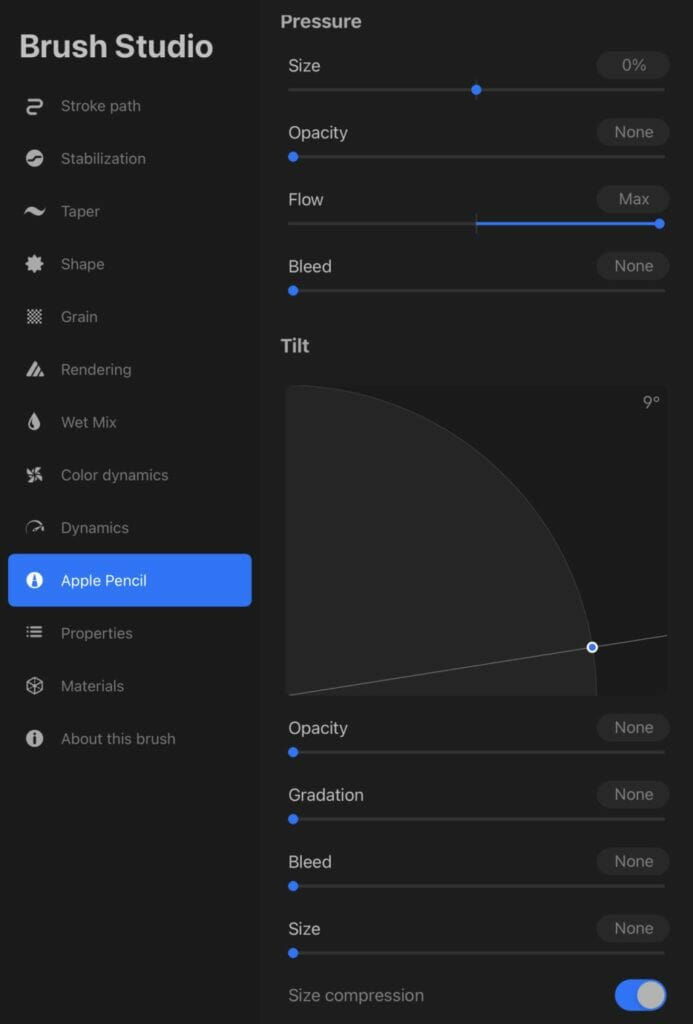
Apple Pencil
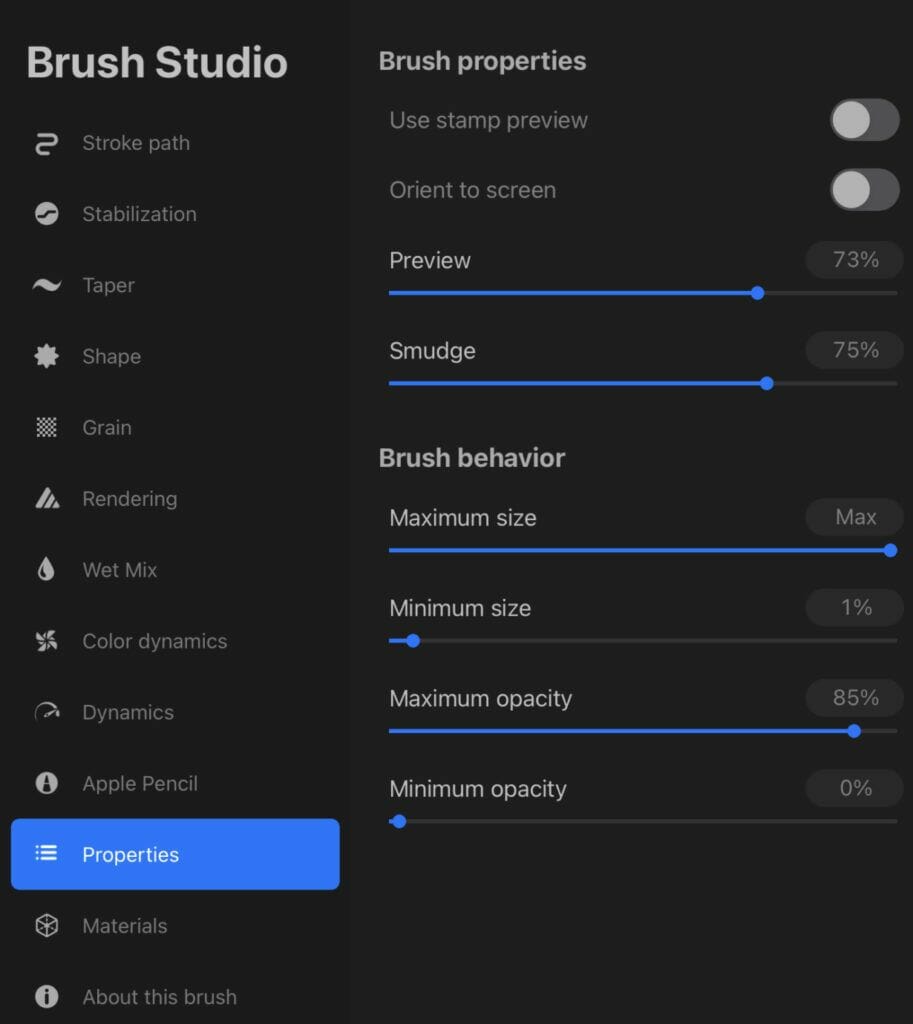
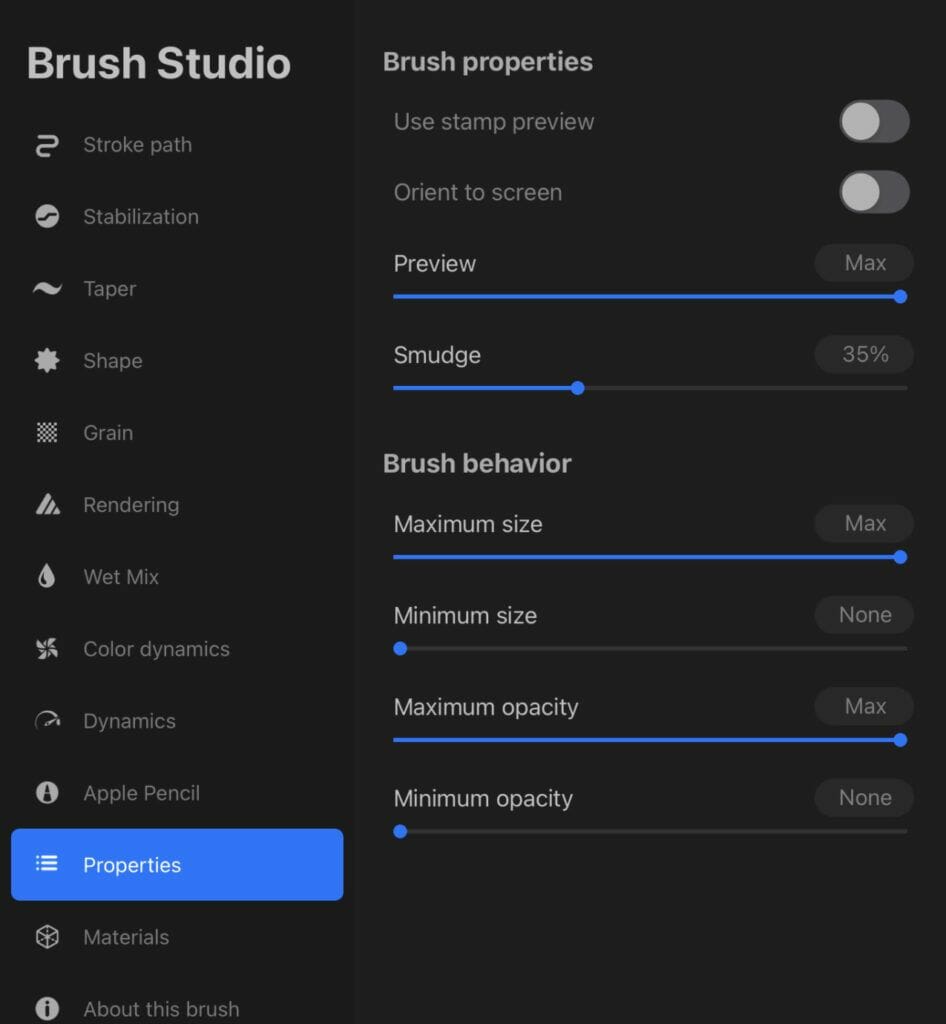
Properties
Lets "Materials" as default.
The section "About this brush" is to save and name your brush.
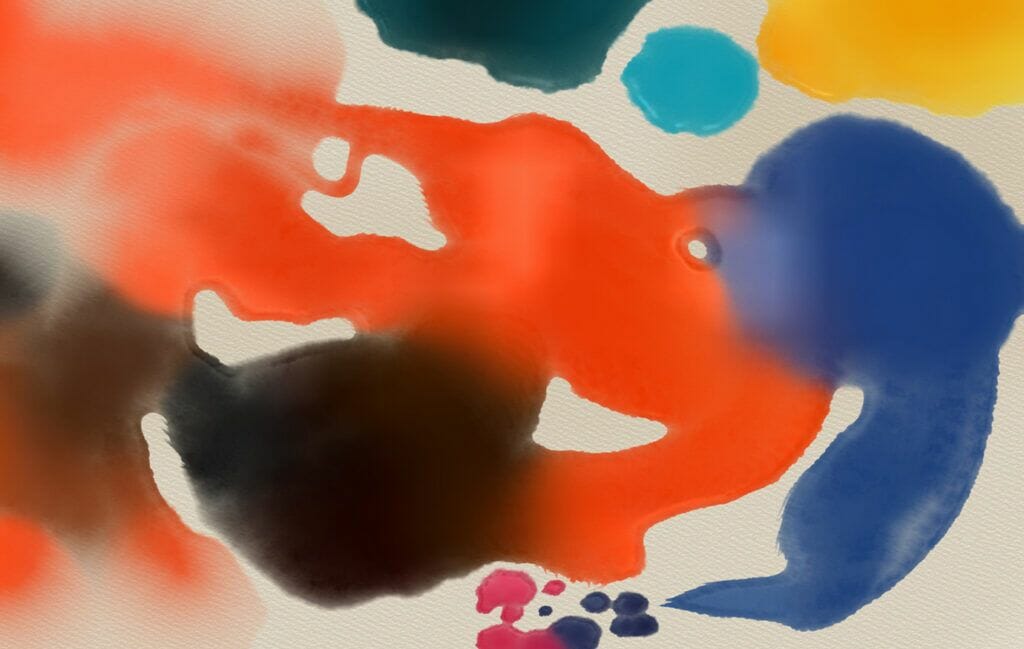
Now our brush looks like this...Not too bad, but not good enough.
The wet effect is interesting, but the result stay too basic, we must add more depth and texture.
At this stage we can come back to the "Grain" section to add more texture but i would prefer to experiment with a second brush in "Combine Mode"
It's more difficult but the result could be more interesting and unique.
We keeps our first brush on the side, and we start a new one from scratch.
Create a new brush as explained previously.
We won't create our shape for this second brush, we will use one of the inHouse brushes of Procreate.
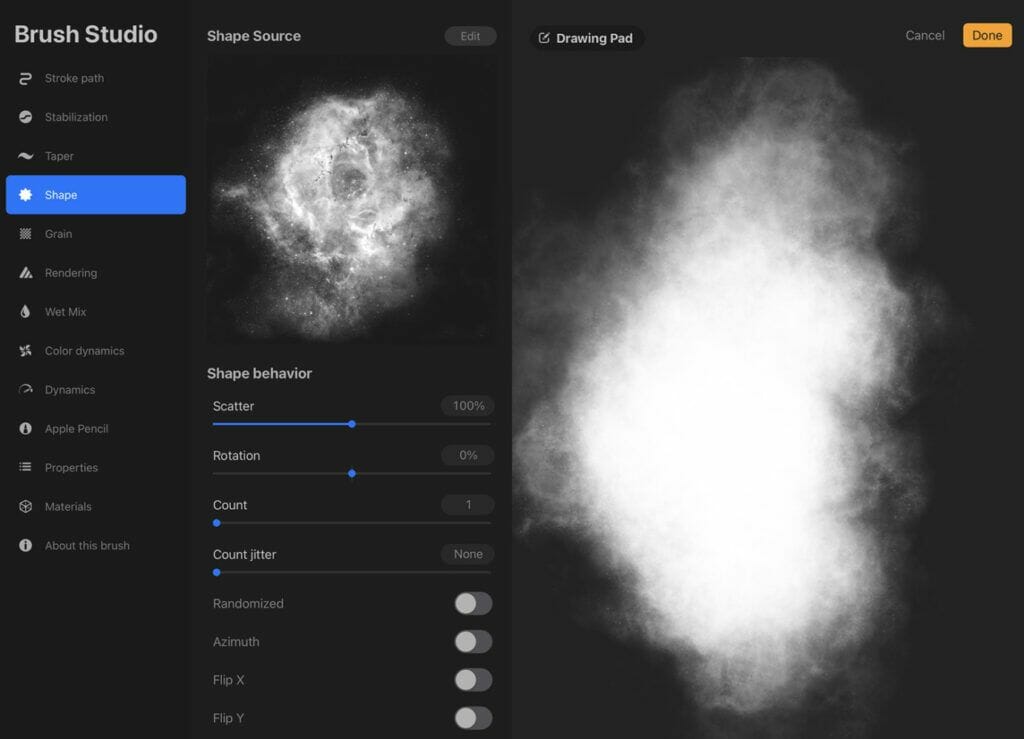
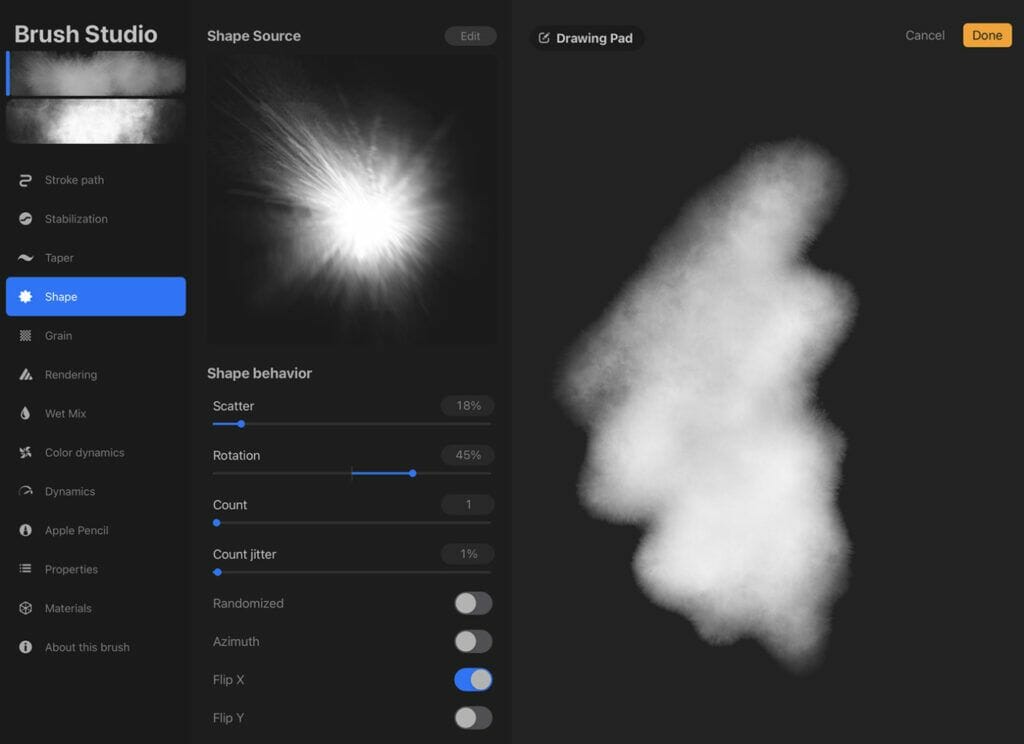
In the shape section, import a shape from the Procreate shape library named "nebula".
The Nebula shape seems to be ideal for a watercolor brush.
And adjust the settings following the next photos.
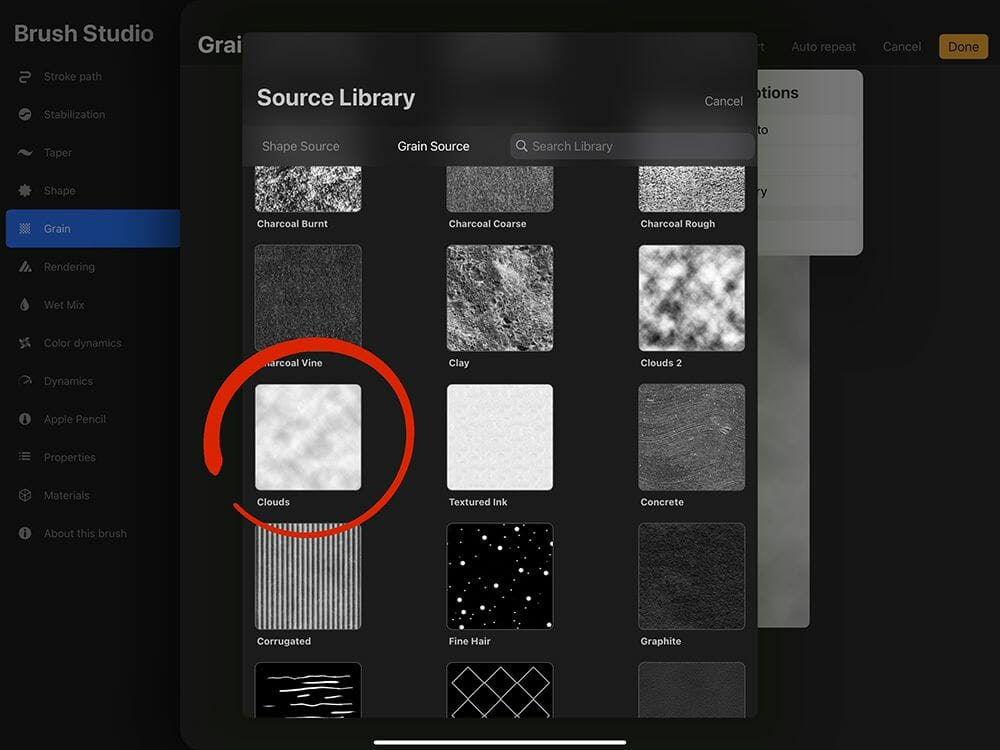
In the "Grain" section, edit the grain source and import the one named "Clouds".
Adjust the settings...
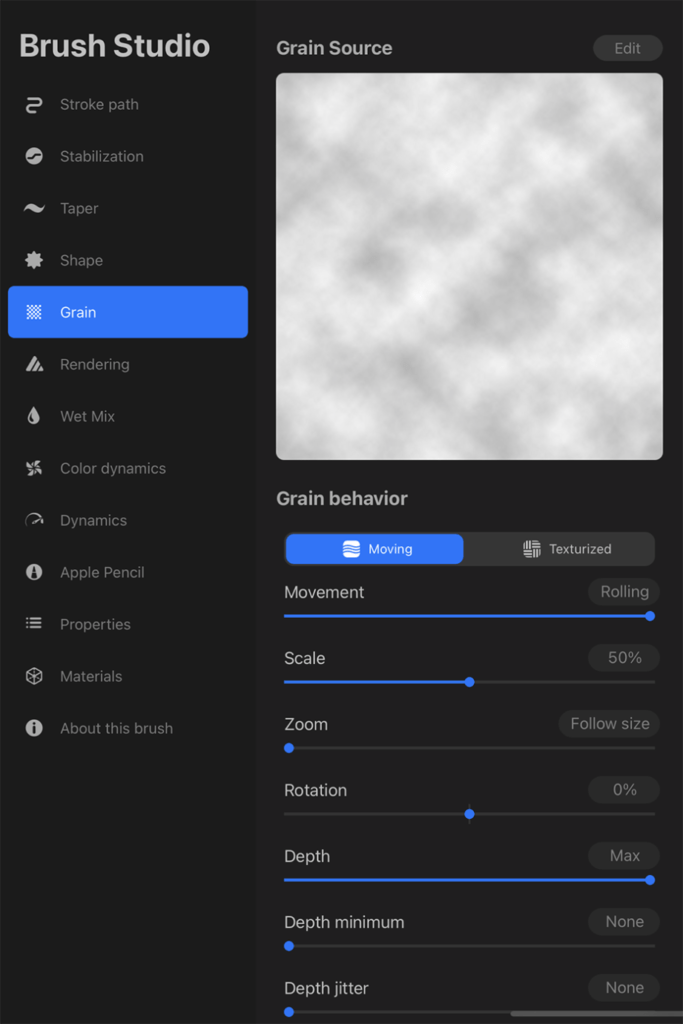
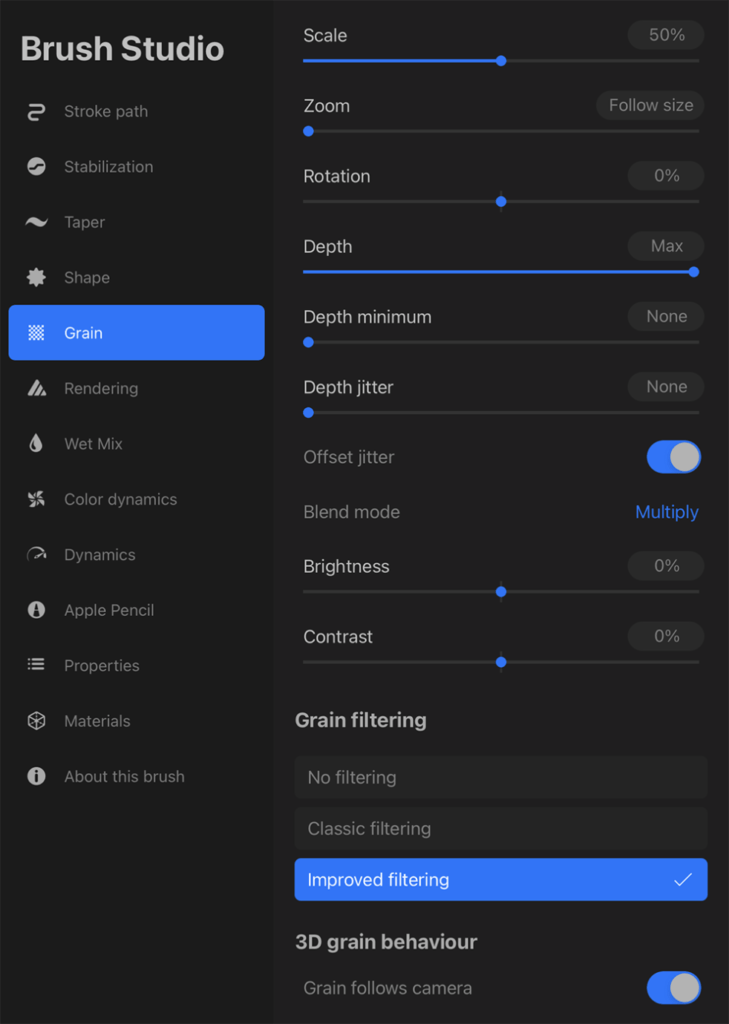
Exactly same way than the first brush.
Stroke Path
Stabilization all settings at None
Taper also
Rendering
Wet Mix
Color Dynamics and Dynamics as default
Apple Pencil
Properties
"Materials" and "About this brush" as default.
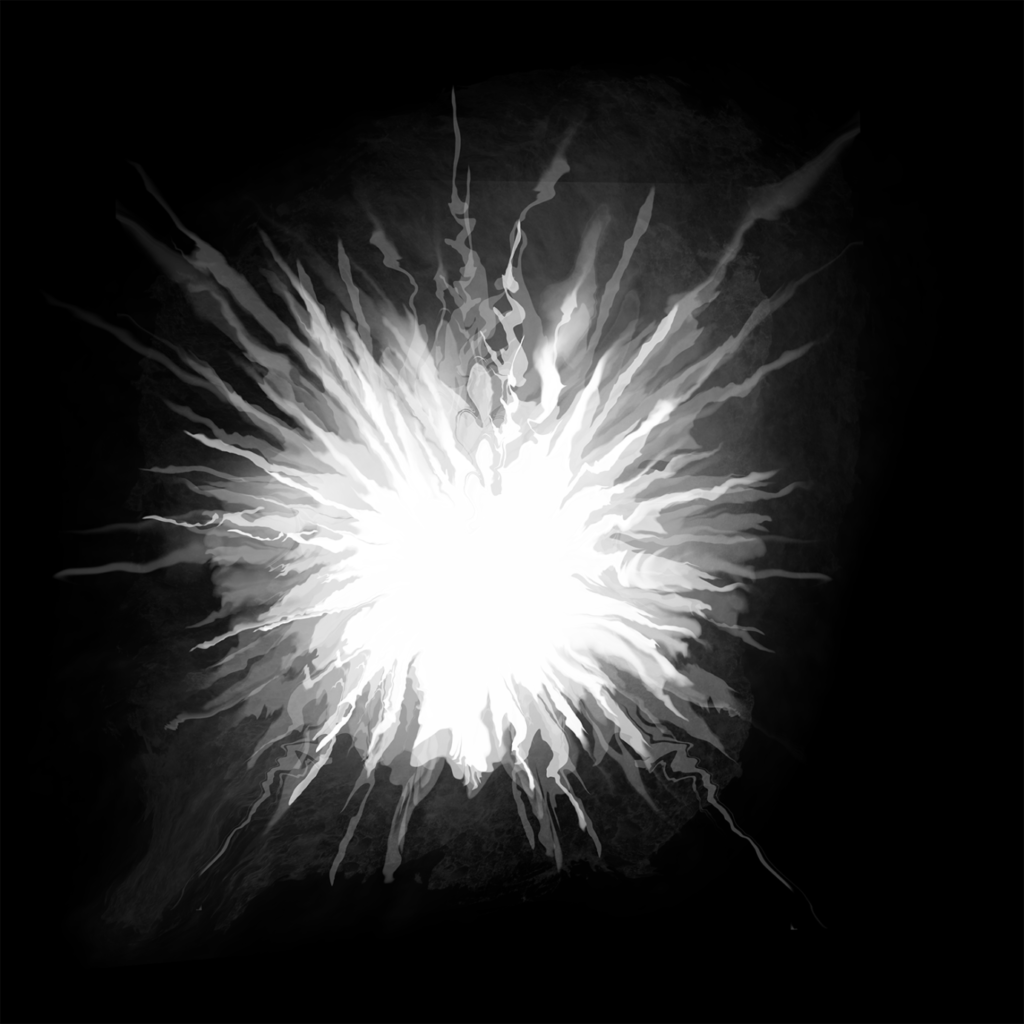
This is the result of our second brush.
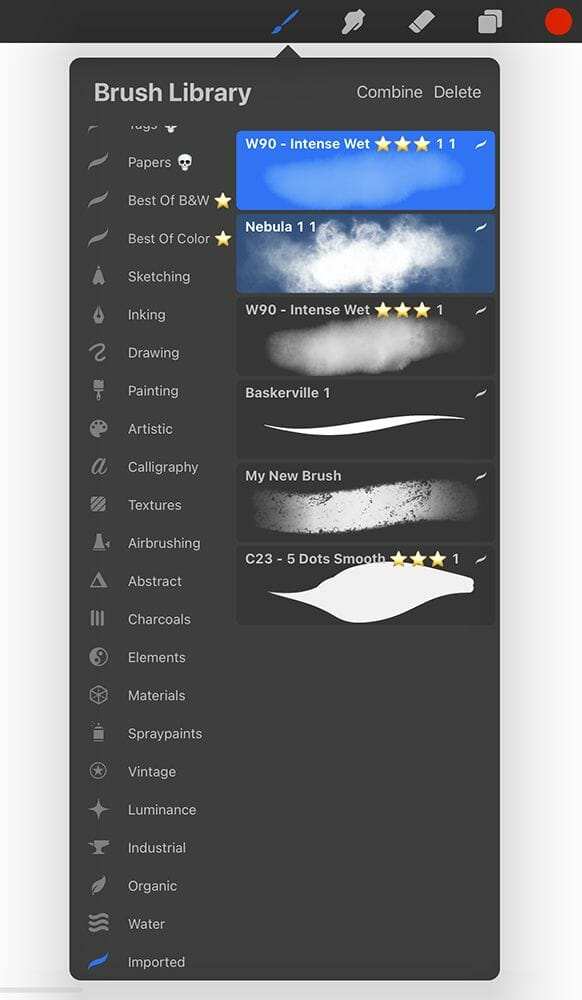
To combine them, open your brush library and select the first one.
Then slide right the second to select it also.
Click on "Combine"
Now when i click on my combined brush i arrive on the brush settings.
You can see my 2 brushes on the top left corner.
If i click on each brushes i can access to their own settings to modify it if necessary.
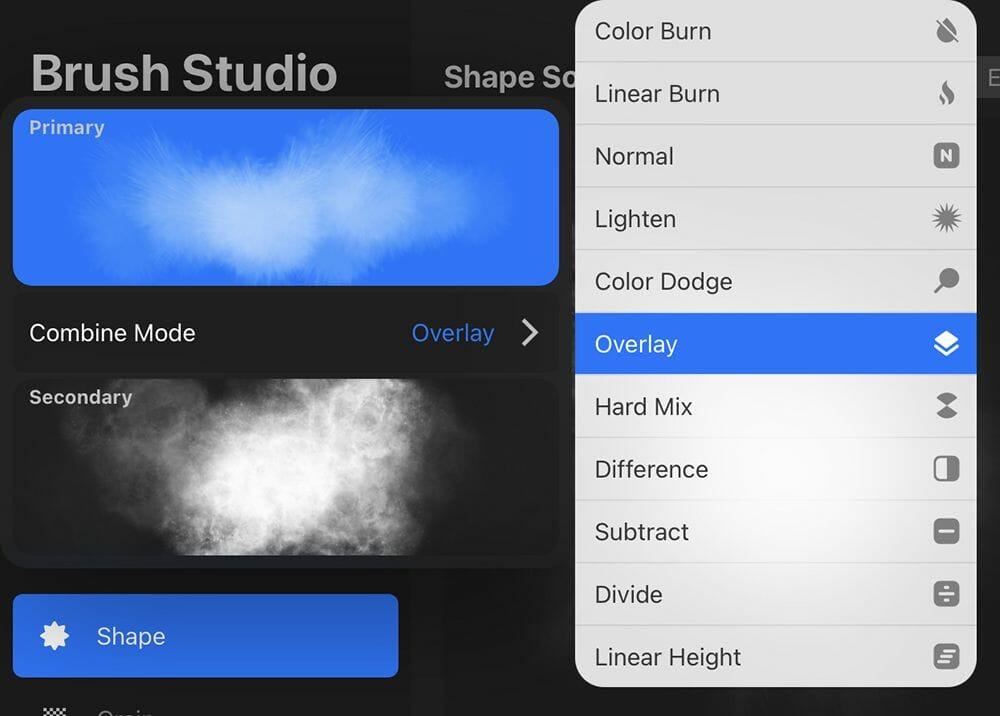
If i click a second time on the first brush, the Combine Mode option pop up.
On this sample the "Overlay" mode is activated.
Click on the ">" next to "Overlay" to open the different modes.
Let's do it in video...
29 $Purchase