kids love drawing, from their first abstractions on the walls of their parents to their first stick men, their creativity is always in action.
Create an outstanding world, develop their creativity and their abilities.
It's an invitation to let their imagination run and to bring forth various characters and creatures that live in their dreams, to tell stories they've imagined.
They can bring those characters and stories to life and make their cartoons and animations.
From the age of 18 months, children love to scribble.
Bit by bit, their drawings evolve to be more complex and thought-out.
However, drawing is more than just an amusing activity – it plays a big role in a child’s development.
As the years pass, children learn to properly use a pencil and drawing becomes easier.
Coloring books are a good place to start, but there really is nothing better than a simple sheet of Paper and a selection of wax crayons to get them thinking creatively.
So, what are the benefits of drawing for kids?
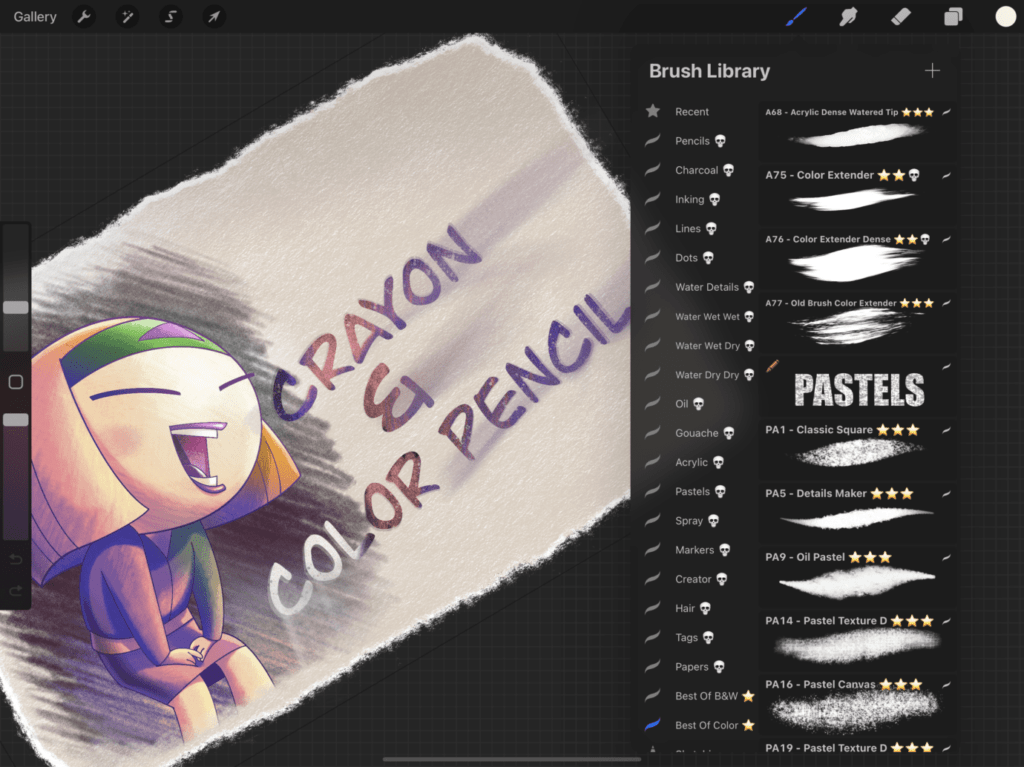
Offering children age-appropriate drawing materials and step-by-step drawing tutorials for creating their own art (such as graphite and colored pencils, charcoal, crayons, oil pastels, watercolor paint, pen and ink) will encourage them to learn to perfect their technique and develop as an artist.
Drawing and painting promote:
Drawing is great for a child’s development as well as for their parents, who may use drawing as a way to better get to know their child through trying to understand why they express their art in such a way and how confident their child is.
It’s important that children feel able to experiment with different methods of creating art – after all, art is a form of play for kids, so they will be far more likely to want to get involved if you give them colourful drawing tools to work with.
There are even some digital drawing resources out there for the little ones.
Bear in mind that drawing should always be a fun activity, and if children don’t want to participate, their decision should be respected.
Children shouldn’t have to draw things they don’t want to just because an adult tells them to do so.
In general, very few children get bored of drawing, however, should this happen, there is no reason to worry.
Parents should also let their children draw whenever they want to.
Here are a few other rules you should abide by when it comes to encouraging your child to draw:
Now the digital offer a range of possibilities for kids to explore textures and creativity.
For the little ones, a computer is still complex but the iPad touch way is quite similar than paper…and nothing to clean 😄.
You can find several apps for coloring and drawing in the apps store, some are good, some not.
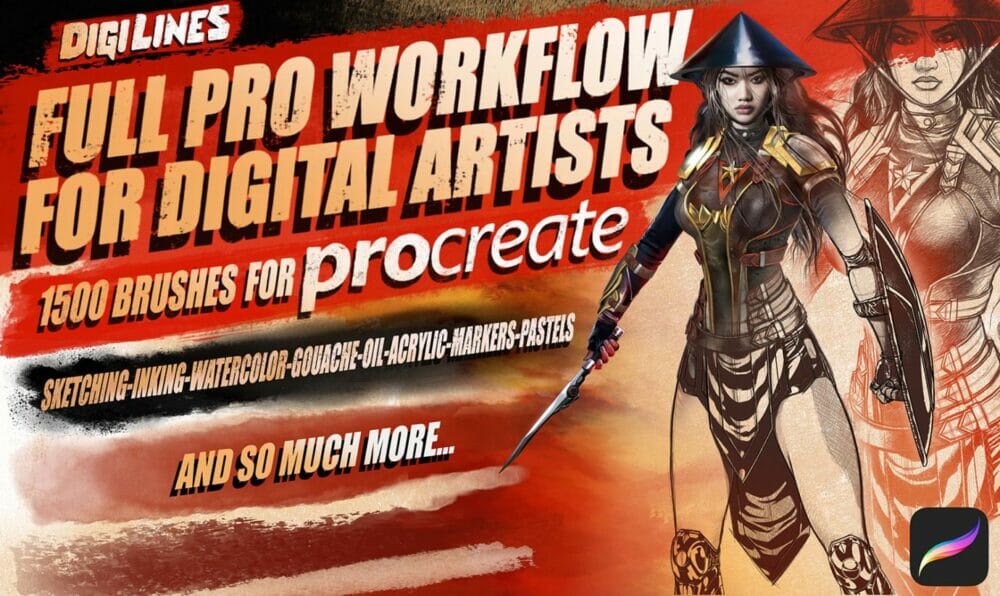
I teach art for kids and teenagers since years and with my experience, I suggest to use Procreate because it’s a really clean and simple environment.
The learning curve is really fast for kids, even this app is a pro level one.
The cost is less than 10 usd one time purchase...
With Procreate 5 you can animate any piece of artwork you design with an amazing new tool called Animation Assist.
At first glance, the tool can seem really daunting but once you get the hang of it your possibilities are endless.
This tool opens up a whole new world for lettering artists, illustrators, and designers looking to create captivating visual stories via Procreate 5.
But it’s also amazing for the kids to develop their first animation, from very simple shapes to more detailed.
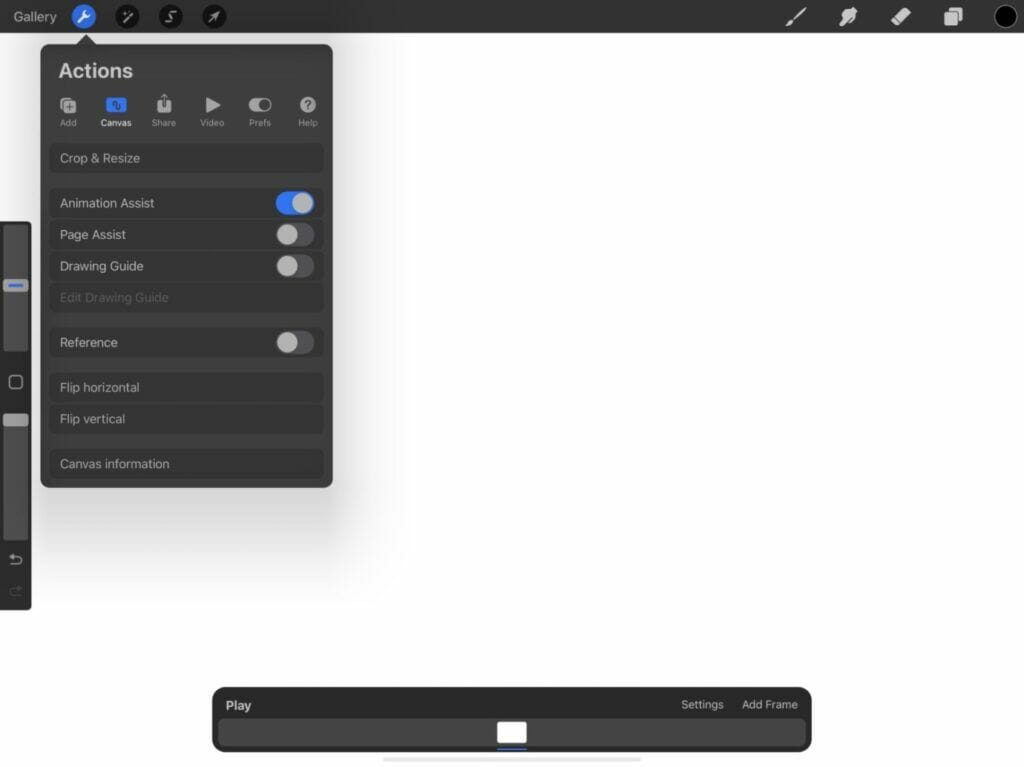
Let's see first how to use the animation tool in Procreate.
Settings>Canvas>Animation Assist>
Turn the toggle ‘ON’.
You should see a bar pop up at the bottom of the canvas with a couple different options.
One Shot: Plays the animation once from start to finish like a story.
Loop: Plays the animation thru and then loops it over and over again.
Pingpong: Plays the animation from start to finish and then from finish to start.
These are frames that are see thru so you can see where to draw next in your animation.
Adjust the number of images you want to see before and after your drawing selected.
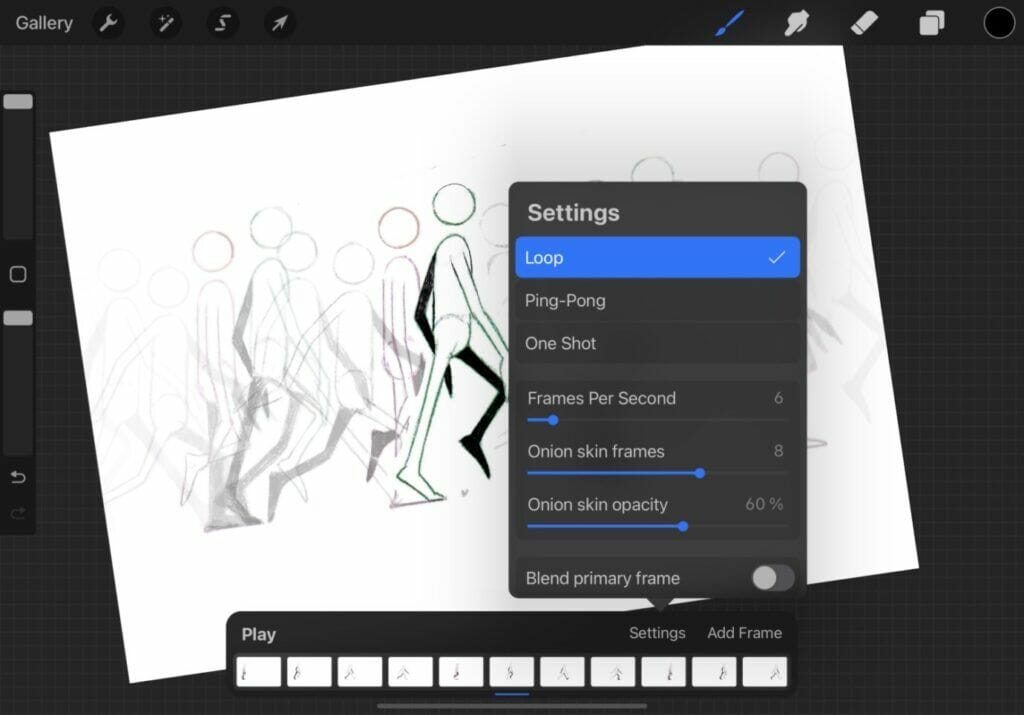
This is so you can see where you’re drawing better.
Onion skins in the real world would be all of your transparent layers of paper in your animation.
You don’t want their opacity to be 100% because then you wouldn’t be able to see where to trace.
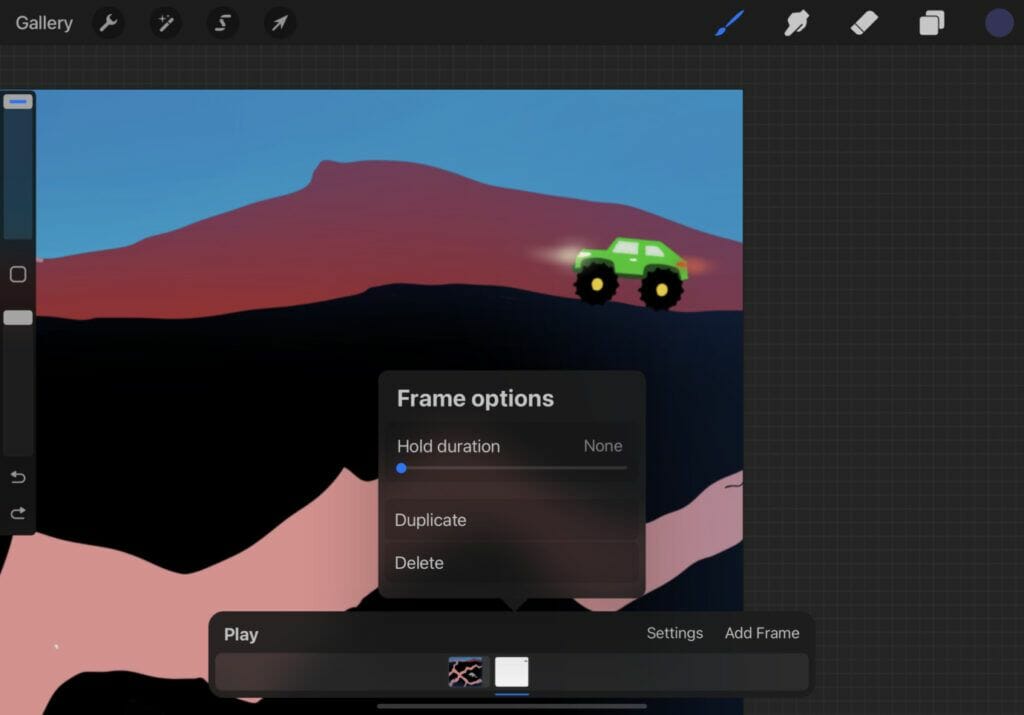
5. CLICK ‘ADD FRAME’
The frames are the layers so when you add a frame you are adding a layer.
Think about it like you would a paper flip book.
Each frame is a page in your book that makes up your entire animation.
Now that you have decided how you want your animation to move, go ahead and start with layer one.
What I like to do is copy my last frame to all my layers and then erase objects as I go.
Once you finish making your fames you can mess with the frame speed.
Go to the Animation Assist toolbar and click Settings>Frames Per Second.
Then hit ‘Play’ to decide if it’s the right speed for you.
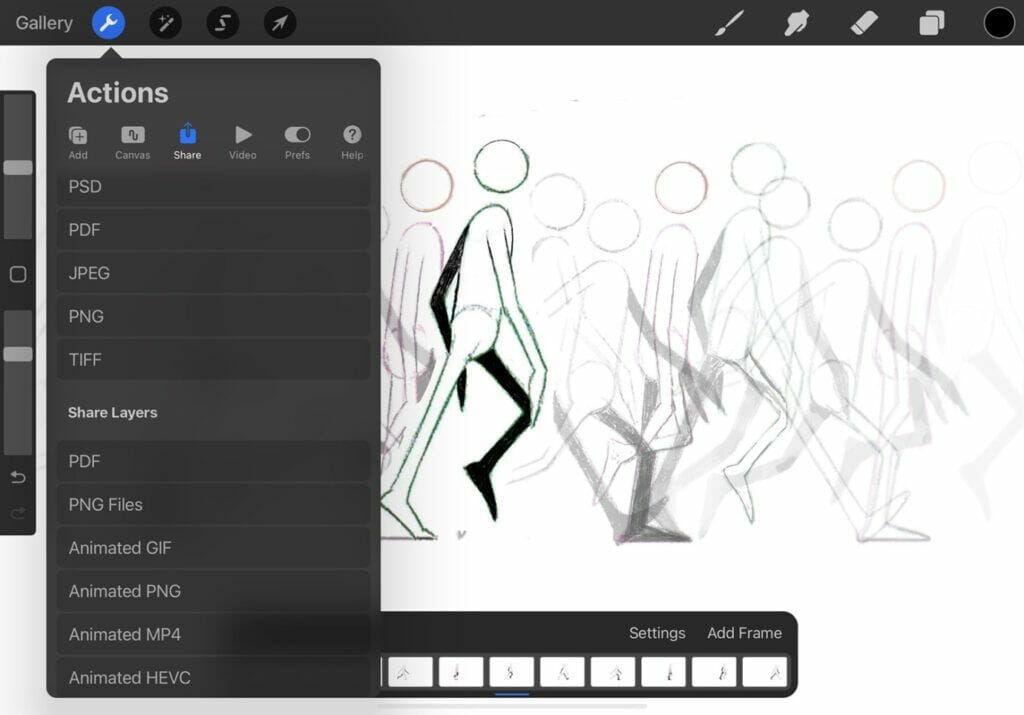
Go to Settings Panel at the top left of the screen.
Tap Share>Share Layers> Choose from Animated GIF, Animated PNG, Animated MP4.
Gif if you wants to share on social medias, or MP4 as a video.
Then you’re done!
After teaching your kid how to use the animation assist, you will be surprised how even little ones, use it easily.
For the youngest, around 6 years old, they can start by animate abstract things or their name.
They can start by any shape or texture and move it or modify it in the next drawing.
Or animate their name...
After few abstract experimentations, they want to make create stories.
The best start to understanding animation process is just moving around a simple shape by copying this shape and move it.
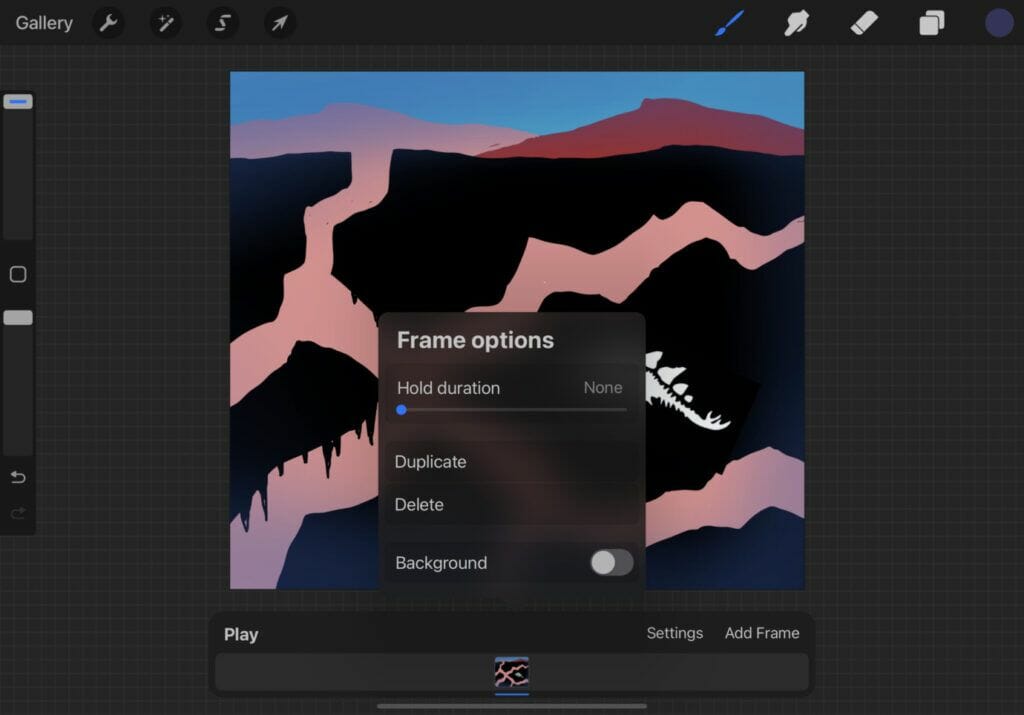
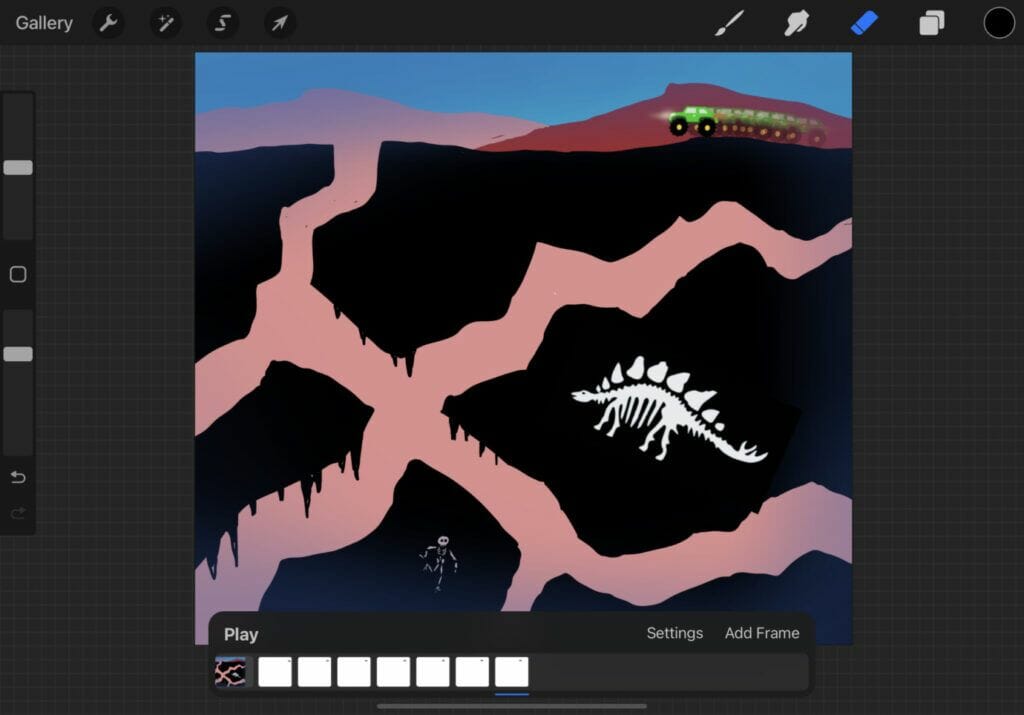
For this, first create a background. In this sample the background is just a simple black tunnel cave.
NOTE: The background and foreground are basically the hold images appearing on every frame.
The background will be behind the animation, and the foreground in front.
In the tool bar it will be the first frame for the background, and last one for the foreground.
Let's say than at the moment we forget about foreground, and focus only on the background.
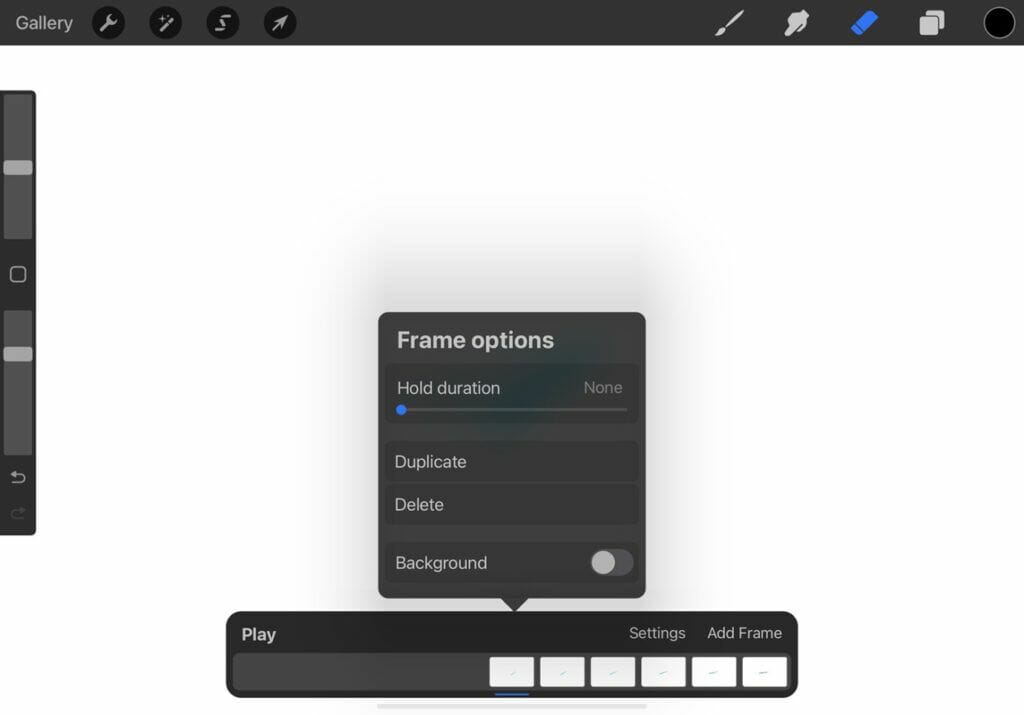
Touch the first frame in the animation toolbar, Frame options will pop up, check "Background".
This frame or layer will appear during the full animation.
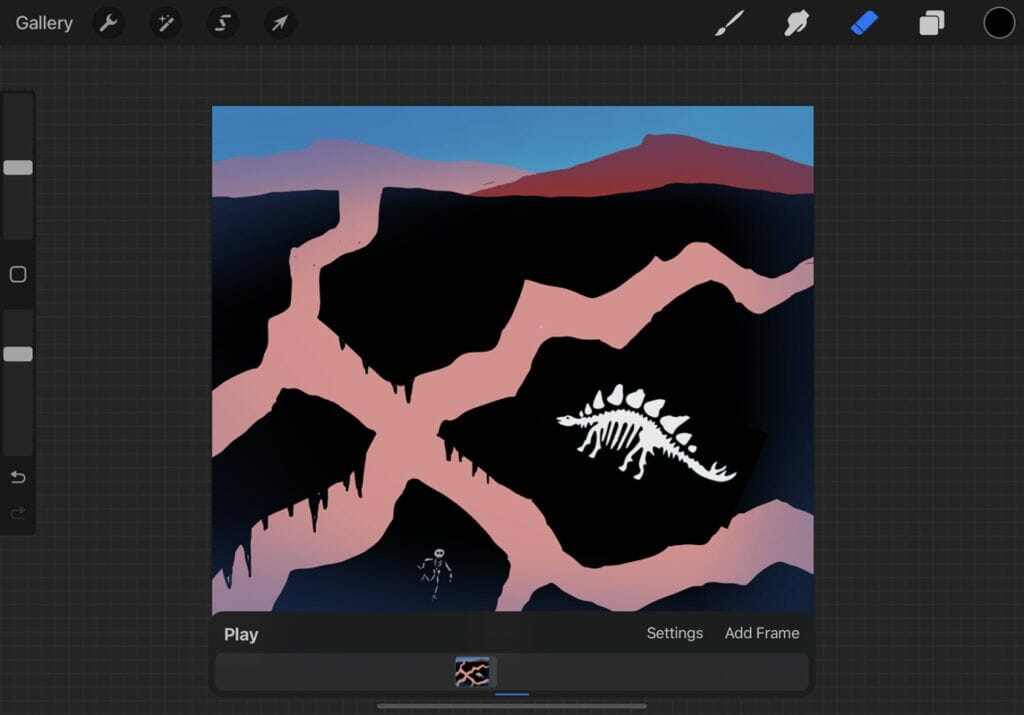
Let's return to the background design. In the previous cave sample sample, the foreground is the black cave, and the foreground is just a flat blue color.
The animation is a small robot...
Process to do that:
1/ Create a background
Here, another tunnel, a bit more complex.
One part ground and one tunnels gallery, side view.
When it's done, turn on animation assist as explained previously.
Touch the frame in the animation toolbar and turn "background" on.
Add frame…
Draw a small simple car, off-road style. No matter proportions, you can draw it big if it’s more easy…
we will adjust size and position in the next step.
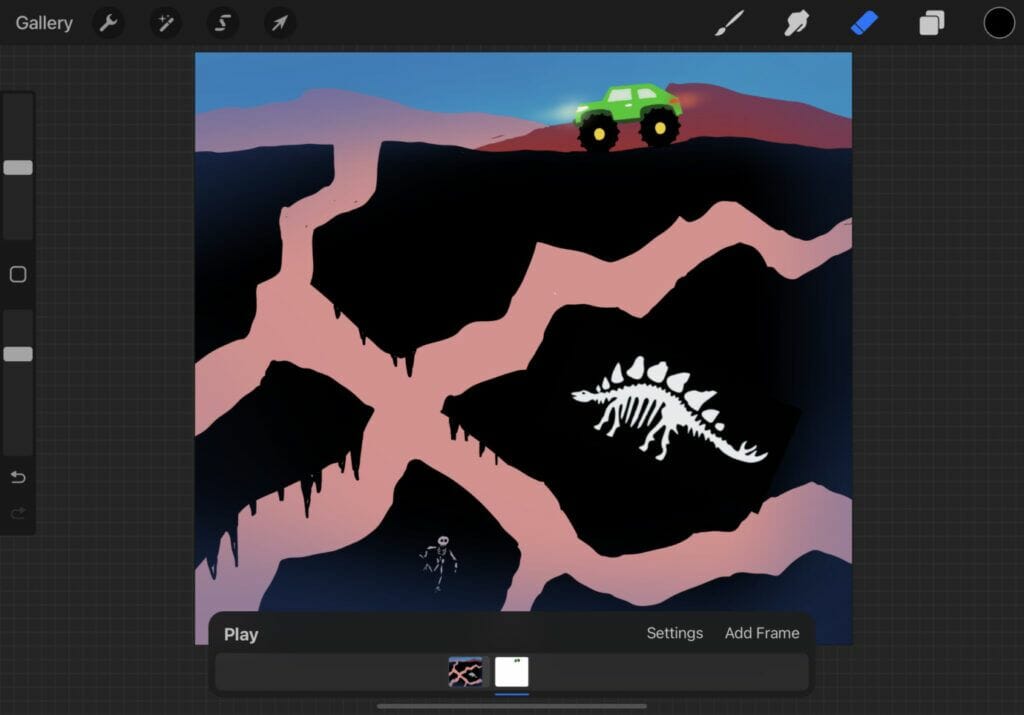
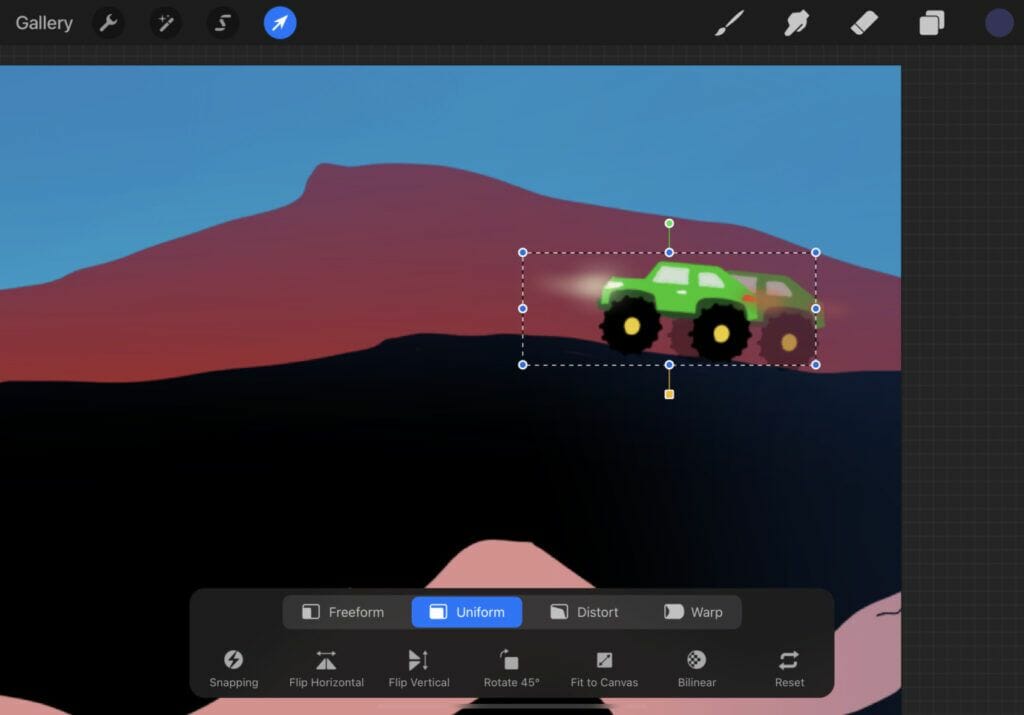
Select the car by touching the selection tool at the top of the screen.
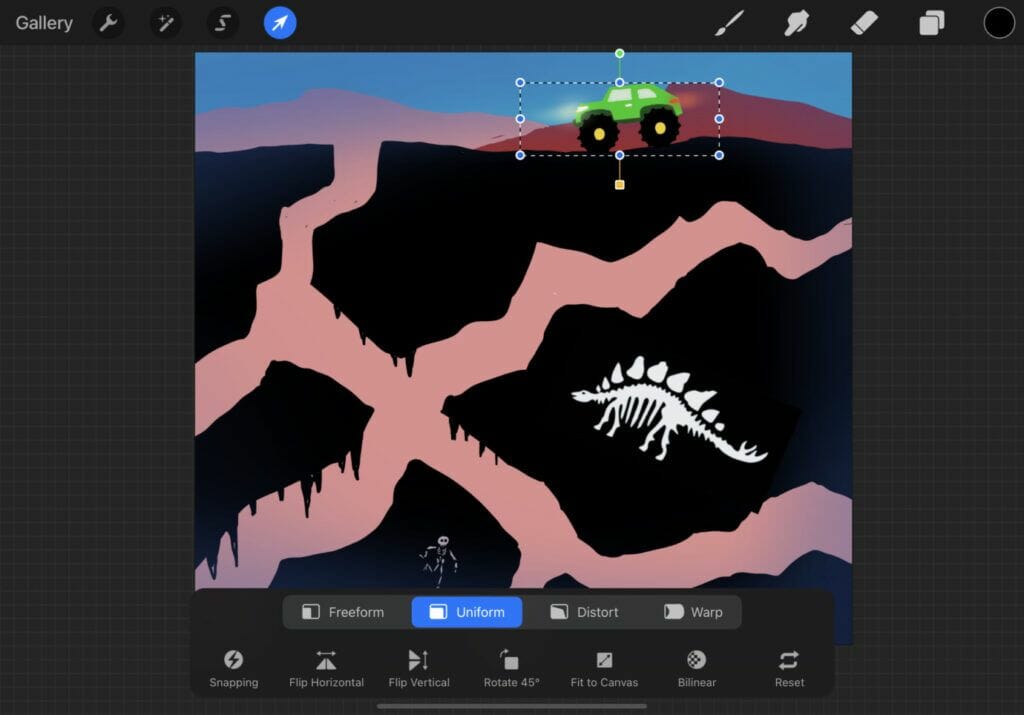
With your pencil touch one corner of the selection area and adjust the size at good proportion according to your background.
Place the car where you want to start your animation by touching anywhere outside the selection area, and slide it where you want.
when it’s done uncheck the selection tool.
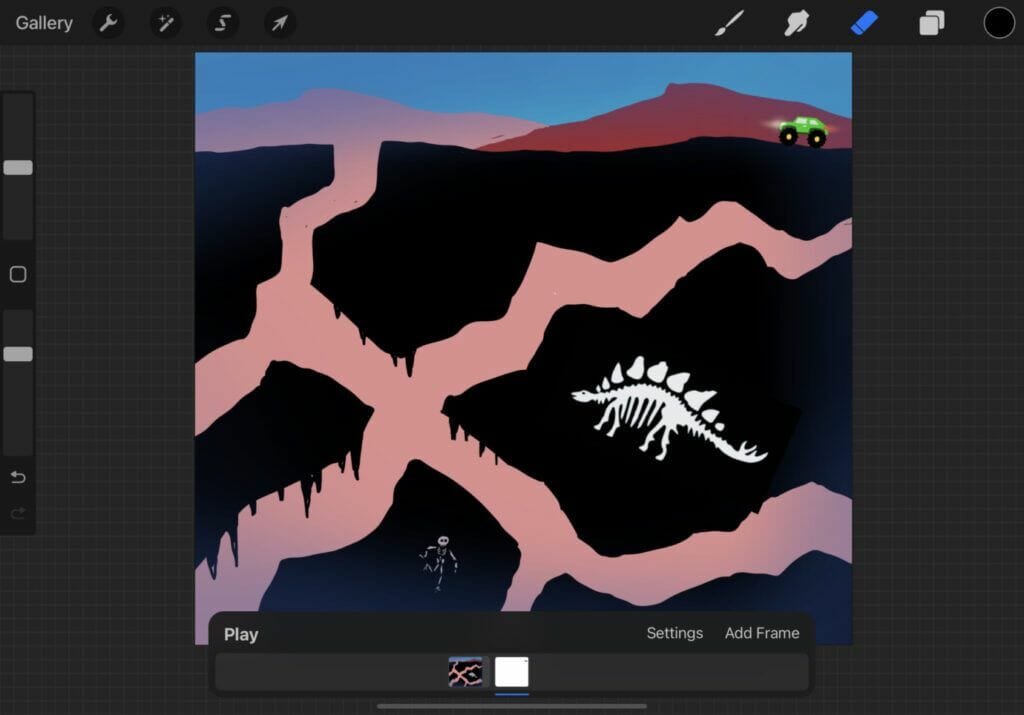
In the frame option of the car, select duplicate.
Select it and move it in the direction of the movement.
Do it again until you obtain your full action, this part will be the animation creation.
The onion skin let you see the previous positions of the car.
When you finish to duplicate all the cars, your animation is done, and you can adjust the speed in the settings animation toolbar.
In this other sample, the robot body is the foreground and the blue is the background.
The head and arms are the animation.
In this one, the road is the background and the car is the animation.
Here, the sea and iceberg are the background, the boat is the animation.
Simple sample of adding texture on the butterfly wings.
The butterfly and blue are the background, only the colored texture is the animation.
Animation push the kids to organize their way to build the project, not going on simply, but they must have a work strategy to arrive to their goal.
Simple random animation free style.
Step by step they will access to more difficult kind of animation, and start their first sketch animation.
A classic will be the walking cycle…Start with a stick man is a good way to understand the process.
Then a bit older, with practice they will arrive to do more complexe movements.
But with the 2 next samples we talk about teenagers starting to have experience in drawing and sketching.
But let’s go back to textures, because finally the little ones loves to play with this randomly, like with slime.
let their hand mixing colors and textures is really enjoyable for them…With my young students, I discovered that they love to use my brushes to play around textures and colors, creating amazing abstract animation.
Normally my brush pack is for Pros illustrators and designers, but I also let my kid students explore it because the textures and renders are really similar than real medium.
They can have the feeling to use real charcoal or painting, pencils and watercolors…and without have to clean anything.
Sketching becomes like paper feeling.
Many parents tell me they wants their kids draw or paint on paper, because they consider iPad as a toy.
It can be, but it also can be a wonderful creative tool…With an iPad the kids will be creative but they will also learn about managing a digital process and improve their organisation.
With this brushes, the young creators won’t have any limits in their artworks and explore hundreds of textures.
To arrive to finished artworks…
You can buy this BRUSHSET with the link below.
29 $Purchase